Category: repair


Freeze Spray vs Donkey Kong

I’ve been spending a lot of my free time lately helping the guys over at The Airlock bring some of their newly acquired arcade games back up to good working order. The majority of the time, monitors are the problem area with these games.

One of the latest ones I fixed was Donkey Kong. It’s an original dedicated Nintendo cabinet from the early 80’s. One of the better looking design schemes out there. In the cabinet is the original Sanyo EZ 20 monitor mounted up on it’s side which is important to note for later…

This monitor had a weird problem. It lost all ability to hold the picture horizontally which appeared as vertical static since the monitor is mounted sideways. The weird thing though was that when you first turned it on, it was fine but then if you rebooted it, this condition existed. Sometimes it went into this condition after many hours of play though as well.p

With monitors, my usual starting point is caps. The electrolytic capacitors in this monitor appeared to be 30+ year old originals. CRT monitors are notoriously hard on caps. These games were only designed to last 2-3 years at the most since in the golden era of arcade, it was unfathomable that anyone would care about a game past that point.

Back to Donkey Kong though. Of course I started with the caps. I figured I had fixed it when I fired it back up to a perfectly clear picture. I turned it off to finish reassembling the monitor and when we turned it on to retest, we found our familiar squiggles.

Kelly, one of the guys at The Airlock, thought this may be a logic board problem in the video circuitry since it was a problem we were unfamiliar with in our experience of fixing monitors. After 20 feet of solder later and many questionable joints fixed on the logic board the problem still remained however.

Enter the freeze spray

Since the problem appeared only after the game warmed up, I figured that we may have a chance to pinpoint the faulty component with the old freeze trick. I grabbed a can of r134a that is on hand there and the little red straw and started blasting while someone watched the screen for me. It didn’t take long since the screen went back to a perfect picture practically on my first spray.

I power cycled the system and luckily the problem immediately reoccurred. We repeated this process, each time being more precise with the can of spray until we finally pinpointed the problem component, a 1/4w 1k resistor. Swapping that out fixed the problem and it’s been rock-solid ever since.

It was interesting to me that a resistor became heat sensitive. I was originally expecting it to be a solder joint, a cap(but they were all replaced) or a heat-sensitive IC perhaps.


Always google before wiping

Like many computer techs who work on a lot of computers for people routinely, I too have fallen into the rut of always assuming a virus first.  Unlike most though, I like to try to fix the virus instead of wiping and reinstalling for a couple of reasons.  First is that I like to see and learn about new viruses and what better way to learn than by seeing it’s behavior while removing it.  Secondly, I enjoy giving the owner happiness in knowing that I’ve restored their computer to it’s previous state with all their data and programs in place.  There are several schools of thought on this and both sides have good points but I tend to believe that I can usually find and eradicate the virus.  I generally will verify this with by sniffing the outbound network traffic to make sure it’s not visiting foreign lands without my knowledge.

One of my wife’s colleagues came by today with her laptop running Vista(yeesh!).  It’s a Toshiba Satellite A305-S6841 that’s a year old or so.  The symptom is that it would boot all the way up to a black screen.  Nothing on the screen at all until you waited 10 minutes for the screen saver to click on.  At that point, you’d see that activate.  That’s how I knew it was booted.  Next of course, I tried safe mode.  To my surprise, safe mode booted without a hitch.  While in safe mode, I ran malwarebytes and to my surprise, yet again, the scan came back as clean and flawless…

That’s not where I would naturally stop thinking there was a virus but this time I decided to google the term “windows vista boots to black screen”.  I found that I was by far not the only person to google that term and fairly quickly I was able to find a workable solution.  What I did was boot into safe mode and delete the display adapter driver.  Then I rebooted and the system came right up.  It was using an ugly generic display driver but that at least allowed my to go onto Toshiba’s site and get the new driver and reinstall it.  After that, it worked flawless again.

So in summation, a bit of research and trouble shooting has saved myself and someone else countless hours of reinstalling.  The graphics driver was apparently corrupted and it is HIGHLY likely to happen again at some point.  I’m sorry Bestbuy but I’m calling you out here; Reinstalling is NOT always the answer to every little computer problem.

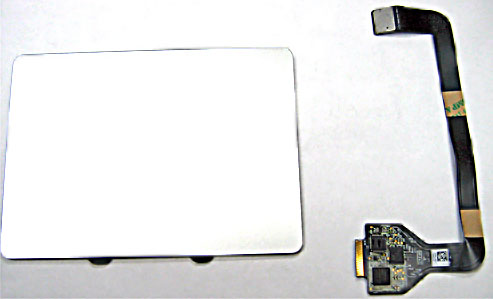
I’ve been having trouble with my mouse for the last week on my MacBook Pro.  I have the MB471LL/A late 2008 model of the MacBook Pro.  The first unibody MacBook; the one with the split bottom case.  Anyways, I’ve been experiencing problems with my mouse.  The whole trackpad usually acts as a button but this last week it has been getting progressively non-responsive.  I would try to click and I would get no tactical feedback and no response from the system.  In fact, the system was acting as if I was holding the mouse button down.  I got a bid desperate and plugged in an external mouse to try to use the system.  This didn’t work either since the left click wouldn’t work.\

Silly me…  I went and ordered a new trackpad from Powerbook Medic.  I chose them for a couple of reasons.  First off, the price was fair.  It was in line with eBay sellers for MacBook parts.  Secondly, they have some excellent instructional videos showing how to disassemble many different systems.  Lastly, they have an identifier that works off of your serial number to precisely identify which system you have and tell you which part you need.  I will be keeping ALL of these factors in mind in the future if I need more parts for repair of my laptop or someone else’s but for now, it appears that I jumped the gun.

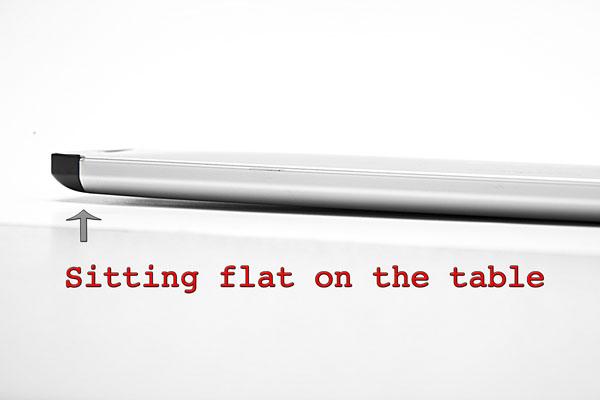
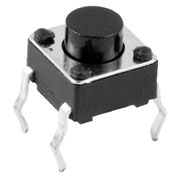
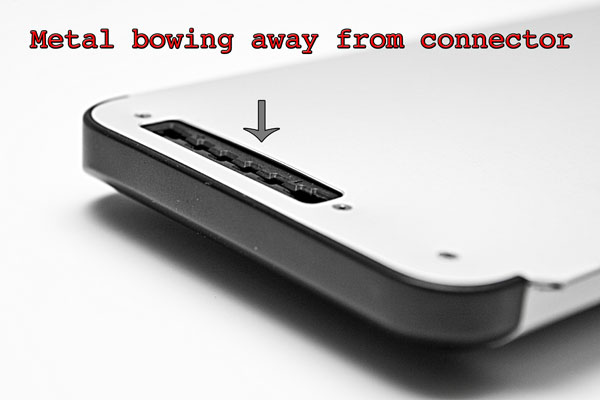
Turns out that it wasn’t the mouse.  I had figured that there was a tact switch under the mouse that I had just clicked one too many times.  Tact switches are commonly used as buttons in mice, power switches on laptops and any other use besides keyboards pretty much.  I became so desperate that I was going to pop the system open and manually disable the ribbon cable to the mouse so that it could be used with an external mouse only until the new part arrived.  When I turned my system over however, I found that the aluminum door for the battery didn’t seem to be closed all the way.  I opened the door and noticed that my battery was visibly bulging in the middle to the point that it wouldn’t even sit flat in the compartment.

In other words, my battery was bulging so much that it was putting pressure on the mouse pad from underneath and keeping the button permanently depressed…  Wow!  I’m a little surprised that it didn’t warp my laptop or do any permanent damage.  In the pictures, the bulging may not look like much but it was enough to cause my problem.  While I was out today, I found a great little store that specializes in Apple computers.  They happened to have the battery in stock so I bought it and popped it in.  Good as new and the battery door closes properly again.

The moral of this story is that you should always try the easy fix first and do a proper diagnostic before rushing out to buy parts.  Once again I think this laptop is great and it feels like a new machine after owning it for almost 2 years now.  I will definitely buy another one when a quad core 15-inch MacBook Pro is available…  Not holding my breath though since it’s been rumored for years.

Powered by WordPress. Theme: Motion by 85ideas.