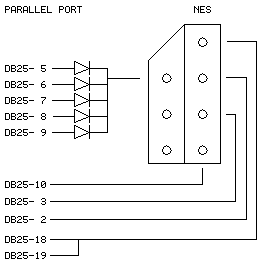
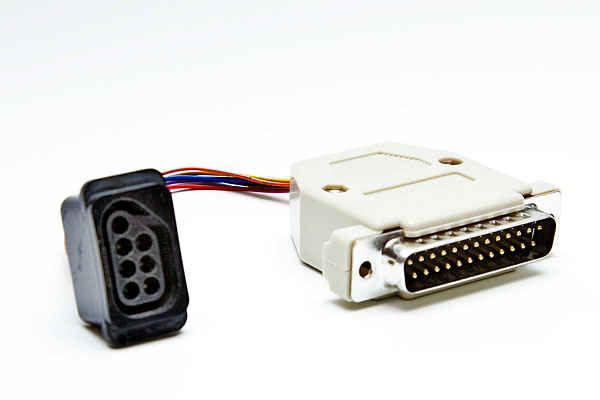
At some point, some clever folks figured out that a NES controller contains a simple 8-bit shift register that can be read by a parallel port. There are really just 3 things that matter. Those are CLOCK, LATCH & DATA. The rest of the pins and the diodes are just for power and ground.
 With my version, I actually used one additional pin for power which was pin 4. According to some sites, 1n914 diodes are ideal but in my case, I used 1n4001 diodes which were readily available at Radio Shack in a grab bag and they seem to work just fine. I think that almost any silicon diodes will do the trick in this application. The only reason for them is so the power is not back fed through the port as a side effect of tying all the lines together. Overall, this is a GREAT beginner hack if you are just learning about electronics since it doesn’t even require a circuit board.

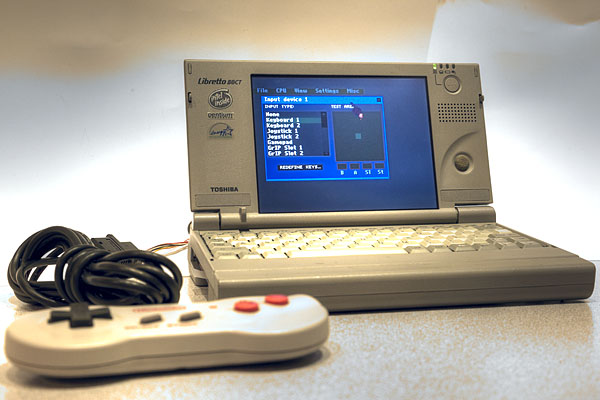
After the hardware was done, the software is the next piece of the puzzle. I am using sneskey as my driver. Sneskey is a slick little program that allows you to map many different types of controllers to keys on your keyboard. You don’t really run sneskey in the background as a TSR though. Instead, you set up the sneskey configuration file to load your emulator. In my case, I used nesticle. To set this whole thing up, download I would just extract all the sneskey files into the same directory as you extract nesticle and it’s companion program dos/4gw. After that, you’ll want to edit the nes.ini file and change the ProgPath line to look something like this:
ProgPath = c:\nesticle\nesticle
Check the key bindings while you are in there. They should be fine though. After that, you should be able to launch nesticle and sneskey with the following command:
C:\nesticle>sneskey nes
Once you have launched the program with your controller plugged in, go to settings –> input –> device 1. In there, make sure Keyboard 1 is selected. If all went well, everything should work except A & B. Hit “redefine keys” and click on “A”, then press “A” on the gamepad to bind the key. Repeat the process for “B” and you should now be good to go.
If you like the content on this site, please support it by using this link to order from Amazon. You know you were going to go there and buy stuff anyhow so why not help me pay the hosting bill.


