Warning: This can brick your Zipit Z2 if you don’t follow the instructions precisely. Even if you do follow the instructions precisely, you might brick your Zipit. This proceedure only works if you already flashed U-boot onto your Zipit.
Read all of the instructions completely before attempting this procedure.
With that out of the way, I’m going to upgrade to a newer version of U-boot that Marex provided me by following his instructions. This newer version will boot from an SDHC card.
First, you need a serial mod to use this method. This is the safest method of upgrading U-boot since you are actually testing the firmware before you flash it. There is also a method to update U-boot from Linux that I will post later. Download the newer version of U-boot from:
http://marex.hackndev.com/zipitz2/U-Boot.rel.Jun.30-2010.bin.
The md5sum is e82ce84f11c1fa50106f5c005bf912f7. Do yourself a favor and actually check the md5 hash. It’s very important that this file didn’t get corrupted in transit.
Here are the instructions:
1) enter serial prompt on the Z2 in U-boot (best is to use minicom — for ymodem)
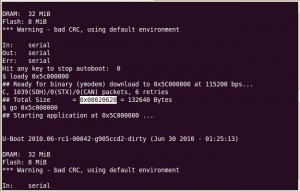
2) Type the following command and then send the new U-boot bin file via YMODEM
loady 0x5c000000
3) Run the new firmware with the following command and the Zipit will reboot. Hit a key to cancel auto boot.
THIS IS THE LAST STEP THAT IS NOT DANGEROUS.
go 0x5c000000
4) after you run “go 0x5c000000”, the new bootloader is now started and you need to cancel auto-boot … you’ll get a new prompt (of the new bootloader) … DO NOT TYPE ANYTHING BUT THE FOLLOWING COMMANDS. If you power cycle the unit before typing the following commands or do any other actions, you will likely brick the unit.
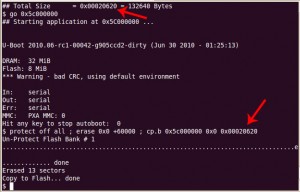
protect off all ; erase 0x0 +60000 ; cp.b 0x5c000000 0x0 0x00020620
5) Type “reset” and pray
Caveats: DO NOT TYPE ANYTHING between step 3 and 4 if you want to reflash. If you just want to test the new firmware out without reflashing, stop at step 3. You can type boot at the prompt and that should show the new functionality and if it works. When you power cycle, the firmware will revert if you don’t complete step 4. Do NOT run step 4 unless that last number matches as indicated in the picture by the two red arrows.
Here are a couple of U-boot commands to play with:
If you want to get rid of the “*** Warning – bad CRC, using default environment” message upon bootup, just type “saveenv” at the prompt.
printenv will show you the current environment variables for U-boot
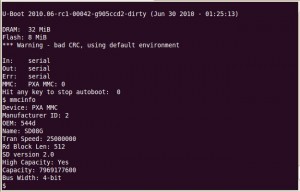
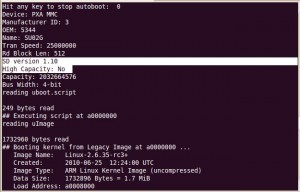
mmcinfo will print information about whatever card is in the SD slot
help should be obvious
reset should be obvious
boot should also be obvious
Thanks again to Marex for providing me the instructions, firmware and answering my questions. Follow this link for further information on this version of U-boot. Follow this link for more general information on U-boot on a Zipit.
If you are interested in buying your own Zipit to hack and you like the information on my site, please buy your Zipit using this link and support my site. You won’t find them anywhere cheaper than that anyways.
If you like the content on this site, please support it by using this link to order from Amazon. You know you were going to go there and buy stuff anyhow so why not help me pay the hosting bill.


