Category: retro


9 Seattle area computer recyclers

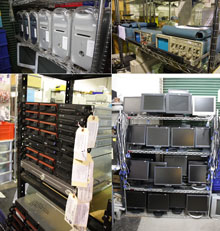
I like to check in on the local computer recyclers from time to time. Seattle actually has a lot of these little places hidden around the area and they are always bursting at the seams with piles of old computer parts.  I’m usually after the retro and more obscure stuff but sometimes I find things that are useful on my MacBook Pro too.  Here is the list in no particular order.

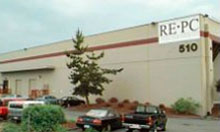
RE-PC Tukwilla – This was Bruno’s in the 1990’s.  The Tukwilla branch of RE-PC has a small section of wall devoted to retro hardware for sale and at very fair prices. I saw an Apple IIe there the other day for $30 and a Commodore Vic 20 for $20, both of which I thought were good deals.

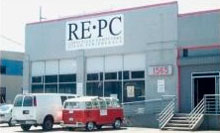
RE-PC Seattle – This was a PC Fixx back in the 1990’s. These days, they have a gigantic warehouse with tons of stuff. Some of it is priced very well and some is a bit high but this store also has a great retro computer museum. The best publicly displayed collection of retro computers in Seattle to my knowledge. Everything from an Apple Lisa to an 8-bit ISA Soundblaster.

Computer Surplus Redmond – This is a great little store with super-friendly owners.  They have a perfect mix of new and old items.  They don’t really save or sell retro hardware since they haven’t seen a huge interest.  (Seems to be a trend)  Might be worth popping into the Redmond Value Village which is half a block down while you are at it.  These guys are more than a typical recycler.  If I weren’t a computer guy, I would take my computer to these guys for service.

PC Recycle Bellevue – This is a small, cramped store but almost always has something worth buying. They have a great selection of cables, drives and random parts such as ATX shields and usb dongles. The window display of this store is ALL retro hardware and software. If they feel like it, they will entertain offers on the window items. That is where I scored my IBM PC XT.

PC Recycle Lynnwood – This store is very cluttered and crowded with incoming piles of computer hardware.  They don’t have any retro hardware here so I probably won’t go back anytime soon but the guy that runs it is friendly and knowledgable.  If you are in the Lynnwood area, this store is probably worth a look.

3R Technology – I’m guessing the 3 R’s are reduce reuse and recycle.  This store is hard to find and deceiving.  It’s on the opposite side of the building that it’s addressed from next to some train tracks.  They seem to have a very high turnover of inventory and a friendly staff.  When you walk into the store, the front room is fairly small but then it opens up to a warehouse in back and you’ll see stacks upon stacks of various parts.  I think I saw a whole pallet of power supplies there once.  These guys are much friendlier than you would expect and they seem to enjoy visitors to their obscure location.

Seattle Goodwill – Not a pure computer recycler but it’s the absolute largest Goodwill I’ve ever seen anywhere and from time to time they will have a good selection of routers, printers and other computer-related items. I haven’t seen full systems there for years but it’s still worth a visit if you are in the area.  Every morning at 10am there is a bum rush of people cramming into the door and b-lining for the electronics and collectibles section of the store.  These are typically eBay poachers which I find fairly irritating but on the other hand, they generally aren’t looking for the same stuff that I am looking for.  In Goodwill locations around here, items are placed on the shelf with a dated, colored price tag, within the month, every color of price tag goes on sale for 50% off.  If the item does sell in a month, it gets sent the Goodwill Outlet Store where it is sold by the pound with exception of  books which are sold for $0.50 each.

Bellevue Goodwill – This is the closest Goodwill to Microsoft so a lot of Microsoft employees donate stuff here.  They tend to have one of the largest and best selections of used tech books that I can think of.  Like Seattle Goodwill, their turnover is fairly high so you never know what you will find here.

Free Geek Seattle – This store is not open yet but they are coming soon.  I’ve been to the Free Geek in Portland and in Vancouver B.C. and I can’t say they have much there for me but if you are low on cash and you need a computer, you can go volunteer at Free Geek and earn a computer.  Vancouver did have a Mac Plus with an external 20mb hard drive and a case for $50 which I thought was reasonable.

That’s my small list.  If you know of any great computer recyclers in the area that I missed, please post in the comments and I’ll get them added.

I’ve been listening to earlier episodes of pauldotcom.com‘s weekly podcast and have continually heard Twitchy go on and on about how great Gentoo Linux is.  I finally got to episode 62 where Twitchy did a tech segment about portage which is the package management system for Gentoo Linux.  It SOUNDS fantastic.  Pretty similar to Macports but even better since EVERYTHING on your Gentoo system is a manageable package. When you upgrade packages on your system, new source code is downloaded and compiled locally(or can be distributed to other systems you run) and you can specify configuration options on the fly.  Portage keeps track of all installed packages and their dependencies(recursively).  If you want to install a package NOT already available in Gentoo, simply write an ebuild file and Portage will handle the rest of the process including keeping track of the package for you.  You are able to upgrade your entire system with a single emerge command every day, week, month, etc.  After hearing this, I felt it was finally time for me to try out Gentoo.

I consider myself a fairly seasoned Linux user.  I’ve been using Linux on and off for work and play since Yggdrasil Linux came out in 1993 or so and moved back and forth with Redhat and Debian over the years.  Gentoo SOUNDS like it may be the answer to many of my annoyances with the other systems mainly being the broken package management systems.  That being said, installing Gentoo Linux does not follow an obvious process.  Not to say it’s not easy but it’s doesn’t have a scripted install like Redhat or Debian and it’s most certainly not a GUI-based installer like Ubuntu..  When you put in the installation CD and boot it up, you end up at a live cd prompt.  What do you do from here?  You read the 7-page(tiny print) Gentoo Linux x86 Quick Install Guide of course…
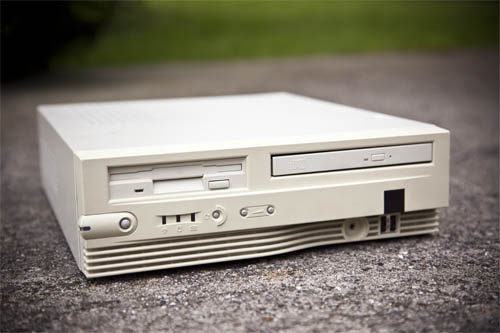
My ancient Celeron 466MHz micro desktop system about to get Gentoo'd

Note: The following is a recap of MY personal adventure of installing Gentoo Linux.  It’s not meant as a replacement for their excellent documentation.  If you read the steps I followed though, you might find a couple of ways that I did stuff differently than stated in the installation guide.

Starting out at the top of the quick install guide, I see that the installation was timed on a MUCH quicker machine than mine.  When I type in:

grep bogo /proc/cpuinfo

I get a result back of 933.54.  The AMD 2000 1.6GHz system used for this guide is really old but not nearly as old as mine.  The result on the AMD was 3337.81 bogomips.  Hopefully my system ONLY takes 3x as long to install.  This little Celeron system is the same system that wouldn’t install Haiku for some reason.

Moving on down in the install guide, it looks like I already screwed up.  Apparently I should have used some switches at the first boot prompt when I started the system up.  When I booted, I should have type in:

boot: gentoo-nofb nodetect

That would disable X from trying to load and prevent a zillion kernel modules from loading but I think since my system is soooo old and all the drivers for my hardware are extremely mature by now, I didn’t hit any hang ups.  Doing a “ping go.com” at the command line netted me a favorable result so I’m just going to move on and call it good for now.

The first real and destructive step of this install is to partition your disk manually.  Disk druid?  I don’t think so.  It’s all about the fdisk.  On my system, /dev/hda is the hard drive.  I knew this because running a “df” command showed my CD-ROM as /dev/hdc.  So…

fdisk /dev/hda

The installation guide assumes that you know how to use fdisk.  Luckily I do.  I’m going to create three partitions for my installation as suggested.  One 128MB partition for boot where the kernel and lilo or grub will live, swap which I’ll make 256mb and a / (root) partition that uses up the remainder of the space on the drive.  I remembered to change the swap partition type to 82 and set the /boot partition bootable flag.  Now I need to commit the changes and format the paritions:

mke2fs /dev/hda1

mke2fs -j /dev/hda3 (-j for ext3)

mkswap /dev/hda2 && swapon /dev/hda2

Now mount the partitions in their proper locations:

mount /dev/hda1 /mnt/gentoo

mkdir /mnt/gentoo/boot

mount /dev/hda1 /mnt/gentoo/boot

cd /mnt/gentoo

After that, you are supposed to set the clock.  Since I’m on the net, I’ll run:

ntpdate pool.ntp.org

Now onto the less familiar stuff.  I need to wget the stage3 archive from a mirror.  I’m going to skip the step of finding a local mirror and simply use the default location:

wget ftp://distfiles.gentoo.org/pub/gentoo/releases/x86/current-stage3/stage3-i686-*.tar.bz2

This pulled a 130MB file down into the root directory of my freshly formatted hard disk.  Now to unpack it with:

tar -xjpf stag*

After that, I need to snag the latest portage build and unpack that so I can start managing packages:

cd /mnt/gentoo/usr

wget http://distfiles.gentoo.org/snapshots/portage-latest.tar.bz2

tar -xjf por*

Now to the weird stuff.  We need to chroot the filesystem.  Chroot fools bash into thinking that a sub directory is actually your root directory.  This allows you to type and run commands in a sandbox of sorts that shouldn’t be able to effect outside files.  In this case we have booted up a live CD and have sketched out enough of a root file system on our new disk to operate now so it’s time to switch into the new root file system in order to finish building it:

cd /

mount -t proc proc /mnt/gentoo/proc

mount -o bind /dev /mnt/gentoo/dev

cp -L /etc/resolv.conf /mnt/gentoo/etc/

chroot /mnt/gentoo /bin/bash

env-update && source /etc/profile

cp /usr/share/zoneinfo/America/Los_Angeles /etc/localtime

While I’m dealing with the timezone, I’ll “nano /etc/cron.d/clock” uncommenting the TIMEZONE line and changing “factory” to “America/Los_Angeles”  Then I’ll set up the hostname.  This is certainly not the most straight forward process:

cd /etc

echo “127.0.0.1 mybox.at.myplace mybox localhost” > hosts

sed -i -e ‘s/HOSTNAME.*/HOSTNAME=”mybox”/’ conf.d/hostname

hostname mybox && hostname -f

After all that, it’s time to build the kernel.  If you’ve never build a Linux kernel, you will probably find this step extremely overwhelming but hang in there.  You will learn the most about Linux in this single step.  Make use of the help that is embedded in the menuconfig script.  They used to be somewhat of a joke back in the days of the 2.0.X kernel but now most of the helps are actually very helpful.  Generally in the more confusing kernel options, it will say something like “if unsure, say Y(or N)”.  This will let you fake your way through the kernel config for the most part.  Don’t forget, you can always rebuild it later.

Note: The first time I ran through this, I forgot to include second extension filesystem.  This caused a non-bootable system since the /dev/hda1 block device is formatted ext2.  These errors are common and you’ll learn a lot from making them since something may not work correctly down the road.  Don’t get discouraged, just retrace your steps and you shouldn’t have a problem figuring out where you went wrong.  The command “dmesg” can be very helpful if you get booted.  If you DON’T get booted, whatever the kernel is hanging on should be printed on your screen.  On my Celeron 466MHz, a fairly stripped down kernel is taking me 100 minutes to build.  I’m sure yours is MUCH quicker so don’t be afraid to rebuild it a few times.

emerge gentoo-sources

cd /usr/src/linux

make menuconfig

make -j2

make modules_install

cp arch/i386/boot/bzImage /boot/

I would have thought that the next natural step in the installation process would be to install grub or lilo but oddly they have you jump to an entirely different topic which is fixing up the /etc/fstab to make it bootable.  So I need to run “nano /etc/fstab” and change BOOT to /dev/hda1, ROOT to /dev/hda3 and SWAP to /dev/hda2.  I’m skipping the network config for now and crossing my fingers that dhcp will do it’s job.

emerge dhcpcd

Also should install cron, syslog and grub:

emerge syslog-ng vixie-cron grub

rc-update add syslog-ng default

rc-update add vixie-cron default

Now I need to point grub to the kernel image that I built earlier.  Using nano I’ll want to edit /boot/grub/grub.conf.  Something like the following should work just fine for now as a grub.conf file:

default 0

timeout 10

title Gentoo

root (hd0, 0)

kernel /boot/bzImage root=/dev/hda3

After the file is saved, then I’ll run grub and walk through a few commands to write the bootloader to the MBR.  If I screw this up, I can just reboot from the live CD, chroot again and fix it up but let’s hope it just works right the first time:

grub

grub> root (hd0, 0)

grub> setup (hd0, 0)

grub> quit

Now for a final bit of housekeeping:

passwd

Time to see if all the hard work paid off.  I’m going to reboot and snag the CD out of the tray in the process:

exit

umount /mnt/gentoo/dev /mnt/gentoo/proc /mnt/gentoo/boot /mnt/gentoo

reboot

This next part is an account of MY troubleshooting process.  In most cases you will have your own set of problems that are different from mine.

DOH!  Kernel panic.  For some reason, my hard drive that was being detected as /dev/hda when I was installing is now being detected as /dev/sda so the boot loader passes the wrong root parameter to the kernel.  I suspect this is a problem with the way I built the kernel.  For now, I want to get the box running.  Time to go back to the live cd, boot and chroot.  First off, I’m going to install lilo since I’m a bit oldschool and I’m more familiar with it.

emerge lilo

mv /etc/lilo.conf.example /etc/lilo.conf

I edited the lilo.conf to point it at /dev/hda for the spot to write the bootloader but then pointed the root partition to /dev/sda3.  When I tried running lilo, it crapped out with a fatal error since /dev/sda didn’t exist when booted on the live cd.  I can do a quick, ugly thing to fix that:

ln -s /dev/hda /dev/sda

lilo

This successfully wrote the Gentoo option to the MBR.  When I tried to boot however, I still got a kernel panic so I rebooted again and typed the following at the lilo prompt:

gentoo root=”/dev/sda3″ boot=”/dev/sda1″

That seemed to work and the system finally booted!  Not ideal but now I’m to a point where I can troubleshoot without the hassle of using the live CD and chrooting.  Next I edited the lilo.conf to show /dev/sda as the boot device and reran “lilo” at the prompt.  When all of this was done it was time for a reboot and this time everything came up perfectly.

My first task with this newly working system was to bring it up to an entirely current, updated state.

emerge –sync

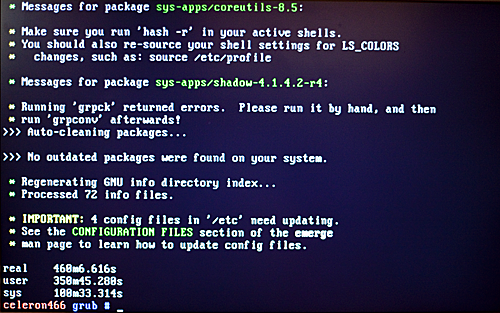
time emerge -u world

The picture speaks to the fact that this is an old, slow computer but the operation was successful in the end.
Final words

How many other modern, current and fully patched operating systems would legitimately be able to run on this computer?  Not many.  I’m not sure why Haiku wouldn’t run but it may have just been circumstantial.  Installing Gentoo was a bit of an adventure but using Gentoo makes Debian seem both bloated and outdated.

If you have been a casual Linux user and you want to learn WAY more about Linux, installing Gentoo is an excellent way to achieve that goal.  If you are a developer/hacker who always needs the latest and greatest packages at their disposal and doesn’t want to deal with dependency hell, you probably already use Gentoo.

I am currently searching for a 486/66 to add to my small cluster of old hardware.  After I find one, I will probably attempt to install Gentoo on that hardware and I expect to be successful with that endeavor.
My first computer, the Mattel Aquarius

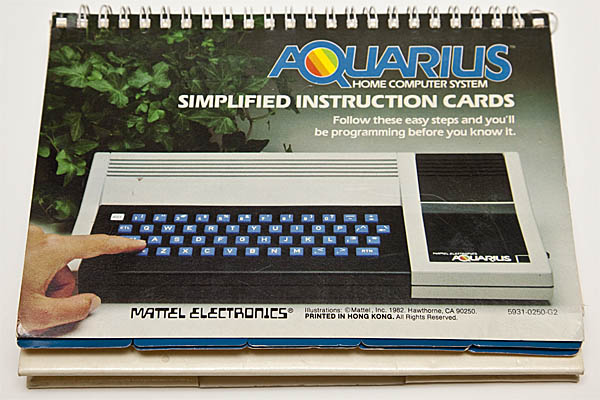
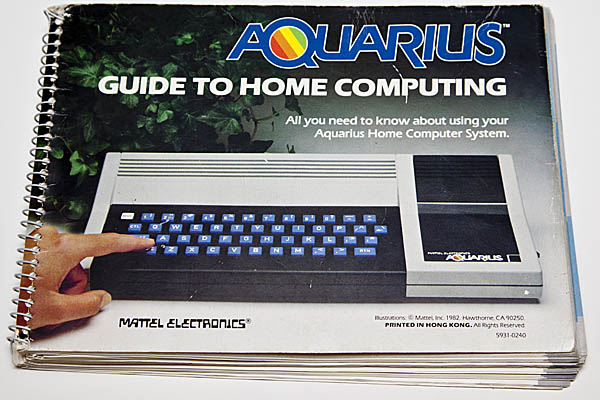
When I was barely five years old, I had a one of the best Christmas presents I’ve ever received to this day waiting for me under the tree.  It was the Mattel Aquarius which was a Z80-based computer released in 1983.  My dad had bought it for me at KB Toys.  We never had a computer before that so I didn’t really know anything about computers or video games but I was instantly hooked to it.  It came with four programs since it was sold as some sort of bundle.  The programs were Snafu, Astrosmash, Biorhythms and Advanced Dungeons and Dragons: Treasure of Tarmin.  One of the most interesting features to me however was the built in Microsoft Basic.  This allowed me to enter programs from the manuals that were included with the system.  The manuals were actually very good and I was able to understand and read them even at five years old.  I obviously didn’t fully understand the architecture of the computer back then but I understood enough to enter programs from the book, run them and make minor alterations to the variables to change the behavior of them.

When my dad purchased the system, it was actually on a close-out.  I wasn’t able to purchase any more software or accessories for that system until eBay was founded many years later.  This was a bit limiting but actually kept me focused on just the one system so I learned a lot about it.  At five, I wasn’t a great typist either so it was kind of nice that the Aquarius had a bunch of macros for common commands in basic already etched onto the keyboard.  In addition to that, most programs came with overlays for the keyboard to perform common tasks as well.

Most people look back on this system as a complete failure for Mattel.  Most would also state that the design was not even on par with technology of the late 1970’s.  To be honest, there are several flaws with it.  The first thing was that the keyboard was horrible.  To this day, I still can’t touch type on it since it’s made entirely of crappy rubber calculator keys.  I know at least one of them got modded to use a Macintosh keyboard.  Next, the controllers are just as bad, if not slightly worst than the Intellivision controllers.  You can physically plug in Atari 2600 controllers but they won’t function at all so I was stuck with the disc controllers.  Also, the power cord is hardwired.  This in itself would be fine except the power supply is external so you have this wall wart that is hardwired into the computer.  This caused me much frustration over the years with regard to cable routing.  Finally, there is only an RF output.  I eventually plan to hack my Aquarius by removing the RF modulator and pulling a composite signal out of the unit but I have not taken the time to so yet.  I will blog about it when I do.

Even with all of these flaws, it was actually a fun little system to play with.  It has only 4k of ram, most of which is used up by basic and by the video but it still left a few pages of memory for coding.  When I was five, I didn’t ever run into this limitation but I can see how some of the programs in the manual would push fairly close to the limits of the hardware.

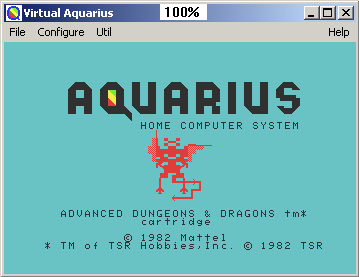
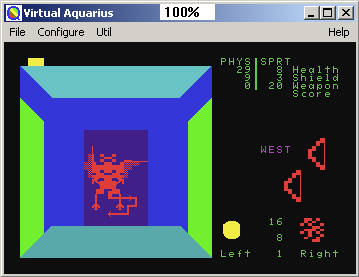
If you aren’t a total purist and want to check out what the Mattel Aquarius was like, you can download Virtual Aquarius for Windows.  This is a fantastic emulator that even includes the roms for all of the aquarius games.  It easily runs on modern hardware at full speed and is a fairly faithful representation.  The only thing missing is the rubber keys and disc controllers but I’m sure you will manage to live without these “features”.

My favorite thing of all on this system was Advanced Dungeons and Dragons: Treasures of Tarmin.  I’ve tried the version on the Intellivision and I have to say it sucks.  Perhaps “sucks” is too harsh but one thing is certain to me, the two games should NOT share the same name because they are nothing alike.  On the Aquarius, you are provided with a keyboard overlay to perform many of the game functions.  This was not a game you could simply pick up and play.  There was a learning curve to it and if you lost the keyboard overlay, you were pretty much screwed.  The graphics are of course chunky by today’s standards but at the time, I thought they were the coolest thing ever.  You crawl through the dungeon in 3D, fight monsters, level up, etc.  Pretty standard, yet primitive, dungeon crawler.  Recently on the emulator, I actually beat this game for the first time ever.  Back in the 80’s I didn’t know if it actually had an end.

A couple of months back, I went back and altered a few programs from the Aquarius manuals.  One of them was the “running man” program.  I also played around with some of the other programs in the manuals too and achieved some interesting effects.  It’s still fun to mess around with basic on an old system like this these days since it’s so simple compared to modern day programming languages and their IDEs.  It’s also easier to learn about computers in general on a system such as this because you potentially can have a full understanding of how all the subsystems work as opposed to modern architectures which have countless subsystems of subsystems that make everything function.  This is one of the reasons I keep this computer around even today.

These systems pop up on eBay a few times a month.  Generally they go for $50-$100 depending on what comes with them.  Not much was released for these systems and they were actively marketed for less than a year so it’s conceivable that you could actually complete a Mattel Aquarius collection.  On top of that, there has been brand new and sealed games sold on eBay for the Aquarius for years.  Night Stalker for instance comes up for sale all the time for $10-$15.  Many retailers and warehouses were apparently left holding the bag on this system so the back stock has slowly been sold off over the last 25 years or so.

Please leave me some comments down below if you have any fond(or not so fond) memories of the Mattel Aquarius you would like to share.

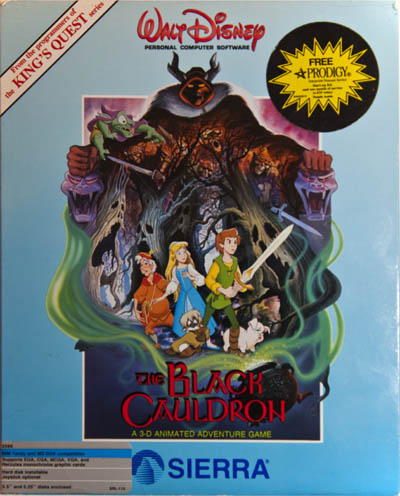
I was at the thrift store the other day and scored a copy of Disney’s Black Cauldron game made by Sierra On-line in their glory days of text/mouse based adventure games. When I first got an IBM compatible system back in the 90’s, the Sierra games were by far my favorites.  They were always consistent, always fun and sometimes a challenge to get running properly which was also fun.  This particular game was released in 1985 although this particular copy was printed and sold in 1989.  According to the box, the system requirements are very very low.  It requires 256k of ram, vga, ega, cga or hercules graphics and a keyboard.  Mouse or joystick optional.

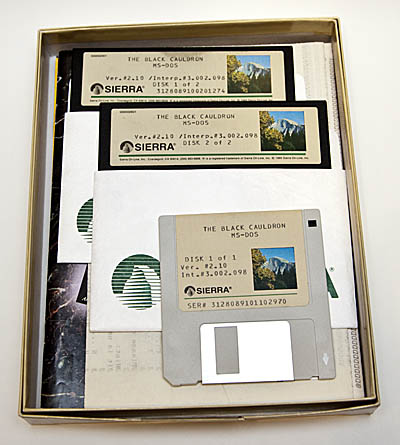
I opened up the packaging and was pleasantly surprised to find both the 5.25″ floppies and the 3.5″ floppy.  There were several other goodies inside as well including the manual, the tenth anniversary Sierra catalog and the original Prodigy Network trial offer which brings back many fond memories.  Another prize buried in this box was a hint guide that someone painstakingly downloaded via dial up and printed on a dot matrix printer.

Using a little forensics, it’s obvious to me that this game was played a lot but taken care of meticulously.  The computer it was used was probably late 80’s technology based on the fact the previous user obviously used the 5.25″ disks and most likely played the game straight off of the disk.  There is a characteristic fingerprint/smudge at the top of disk 1 but not on disk two.  I’m guessing the owner played through the game as far as they could get which took them a while.  They probably never made it to disk 2 on their own.  That’s when they resorted to printing the hint guide.  They played through the rest of the game, cheating with the hint guide to beat it in the matter of a couple hours.  After they beat it, they put the game away for 20 years and someone finally donated it to the thrift store.  All of this only leaves one question in mind: Will this game actually work on my PC XT after sitting in a box for 20 years?

Well much to my pleasure, it decided to work!  I put in disk 1 and ran the install script:

install c:

The 30 year old floppy drive sprang to life and copied the disk to the hard drive.  Disk 2 went just as well.  The installer left me in the c:\sierra directory and told me to type:

bc

This is obviously an updated version of the game since the older Sierra games had much cruder install scripts.  Anyhow, I started the game up.  Obnoxious 8-bit PC speaker music came blasting out.  Sad that the IBM’s didn’t even have sound as good as the C64.  I turned the music off with F2 and could then study the glorious 8-bit graphics.  This must have been an amazing game in it’s day.  As far as the sierra line up, I would say the graphics are similar to Space Quest 1, Kings Quest 1, etc.  The game play is much different however.  This game is geared toward younger players so it requires no typing at all.  Instead you use the F-keys to DO, LOOK, USE, etc.  It’s a good concept that Sierra didn’t fully develop until the days of King’s Quest 5, Space Quest 4, etc.

I tend to like both styles of the Sierra games for different reasons.  I plan to play this one through at some point and see what it has to offer.  Go check out Abandonia for much more information, screen shots and a download for the Black Cauldron.

IBM PC XT, now with VGA video

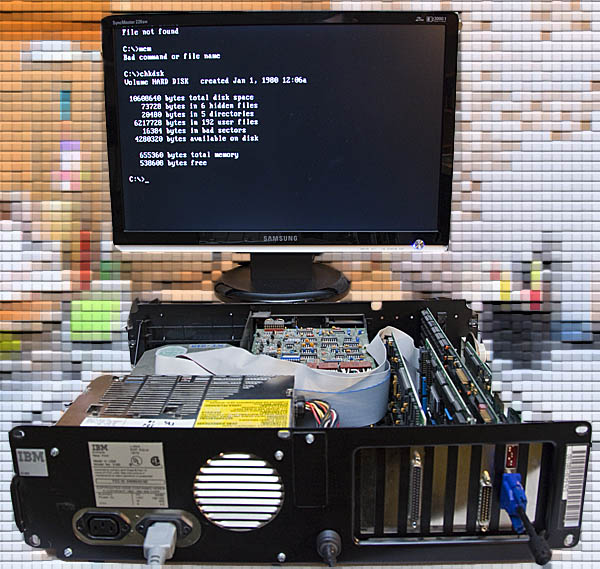
My XT booting up with a 16-bit ISA VGA card

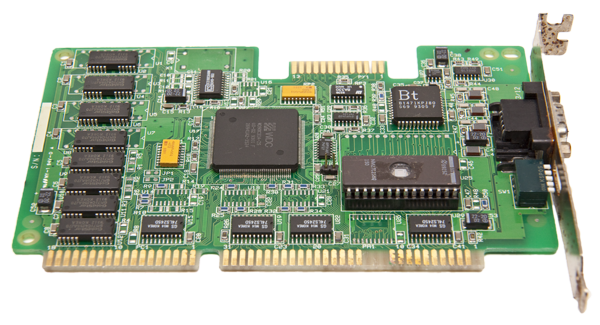
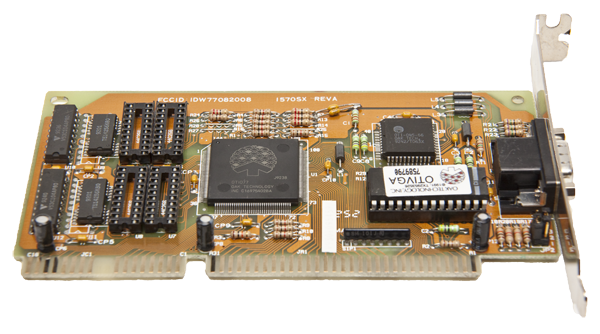
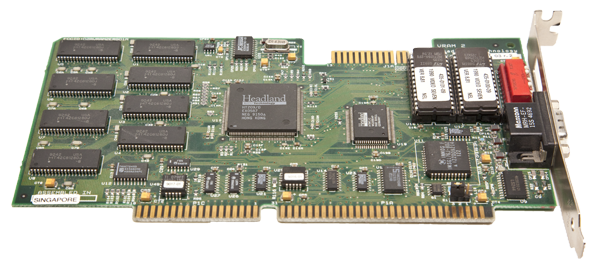
Last time I talked about my PC XT, I didn’t know if it actually worked properly because it had a CGA or similar old video card in it and I don’t have a monitor that supports that standard.  Thanks to some helpful friends, I gathered up 3 separate ISA VGA cards to try out in the system.  There was just one catch…  The IBM PC XT has an 8-bit data bus and all of the video cards I had were 16-bit.  One of my friends helpfully explained to me that some 16-bit VGA cards will work in 8-bit mode.  I was a bit skeptical but I figured that this guy knew what he was talking about since he cut his teeth on an XT.  The list of candidate cards follows:

WDC WD90C31A – I received this card from rkdavis from all the way across the country.  Thanks RK, unfortunately I’ve looked up this card and found that it doesn’t support any 8-bit mode.  All of the jumpers on the card pertain to refresh rates and other trivial settings. This card survived a flood in the basement of a pizza restaurant apparently so I was really rooting for it to work after I was able to clean it up with Simple Green and a toothbrush but alas, it will end up in another project.

Oak Technology 1570SX(OAK 77) – This is a card that I obtained from REPC, a Seattle area computer recycler.  This card was floating around in a HUGE bin of other ISA, PCI and AGP cards that were all being sold as-is for $1/ea.  I thought it was a fair gamble.  Unfortunately after looking up this card, I was also disappointed that it could not be jumpered for 8-bit mode either.

Headland Video Seven HT209/D – The final card that I tried was a Headland Technology 650-0436-03 r.2.  The page that I linked to is not an exact match for this card but apparently the layout is slightly standardized because I flipped SW1-7 and SW1-8 to the open position and it fired right up in glorious color on my flat panel display.  This card was provided by my friend James who has had the card in his closet for years with no real use for it.  It’s also available on eBay from a bunch of ripoff artists for $75-$150.  Granted it WAS a very expensive card when it was new but so what?  This card is worth $20 on the right day to the right buyer IMO.  Whatever the case, this is the one 16-bit ISA card out of my three that will work in 8-bit mode so I’m very happy.

So next, after I have a working card, the system booted up.  I watched in disbelief as it painstakingly counted all 640 kilobytes of memory individually.  Next, even more amazingly, the 20MB Seagate MFM hard drive proved to still be functional since MS-DOS 3.2 booted up.  DOS 3.2 is missing a few of my favorite programs such as edit.exe but it’s a good, solid version unlike the piece of crap better know as MS-DOS 4.01.  The AST clock/ram/controller board miraculously still works as well although it does not appear to be Y2K compliant.  It seems like DOS is ok with a 4-byte date but the AST card keeps jumbling it up when you try to set it to a date in the current millennium.

My next project with this system will be to come up with a method of transferring data to and from this system since my MacBook Pro does not seem to be equipped with a 360Kb 5.25″ floppy drive nor does anything else in my house.  Once I find a way to transfer this data, I’ll have to decide what that data should be.  Decisions, decisions.

I want to give a shout out to Stason for his AWESOME collection of data on old video cards such as these.  Without his page, I would still be caught up in a quagmire of experimentation and trial but most of all ERROR.

Dusting off my new old IBM PC XT

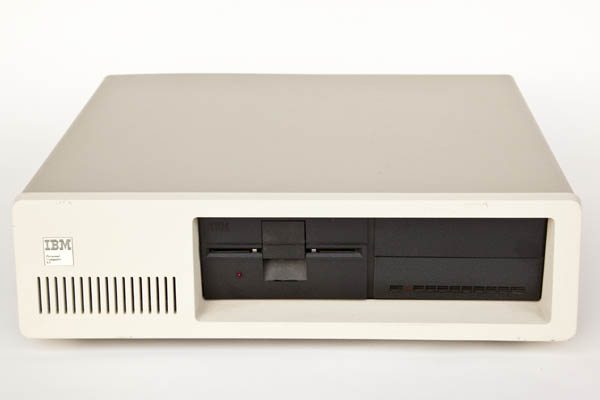
IBM PC XT front view

I was at a computer recycler the other day and there it was… An original IBM XT 8088 system in nearly mint condition.  It was in the front window of “prized” old crap in this store.  I asked the guy if any of that stuff in the window is for sale and he replied, “sure, sometimes it is”.  So then I specified that I was interested in the XT.  He asked what I’d pay for it and I told him $20.  He said, “sure” and it came home in my trunk.  Luckily on the way out the store I noticed the keyboard sitting there.  I asked him if it was cool if I took it and he said it wasn’t a problem.  Later I found out that it’s a good thing I grabbed it because an AT-style keyboard wouldn’t work.

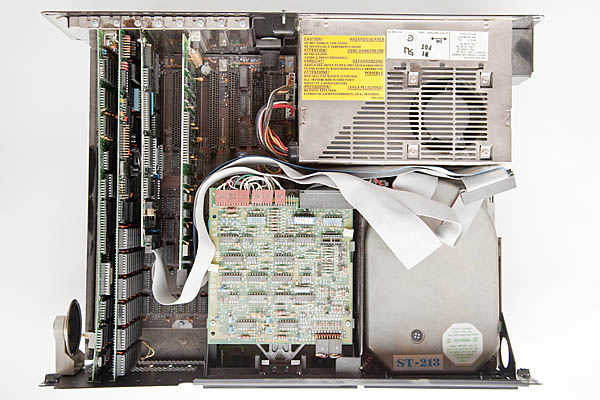
IBM PC XT inside

After bringing it home, brought it out and popped it open to check what was inside.  The system is actually fairly packed.  Someone probably spent $5,000 or so upgrading it to the point it was at.  The memory banks were full and there was an add-on memory card that had a realtime clock as well. Something else I learned was that originally these systems required you to enter the time and date every time you booted them up.  How annoying….  Looking around further, the system has an unmarked graphics card with a printer port.  I would have hoped it was a Hercules but I’m pretty sure it’s not a real one in any event.  There is a 20 megabyte Seagate MFM hard drive and a MFM controller card in there too.  Something else I learned is that IDE pretty much requires a 16-bit data bus to function at all and the 8088 has an 8-bit external bus so it can’t work with IDE without some major trickery so I’m crossing my fingers that the MFM drive still functions.  Lastly, there is a serial port card.

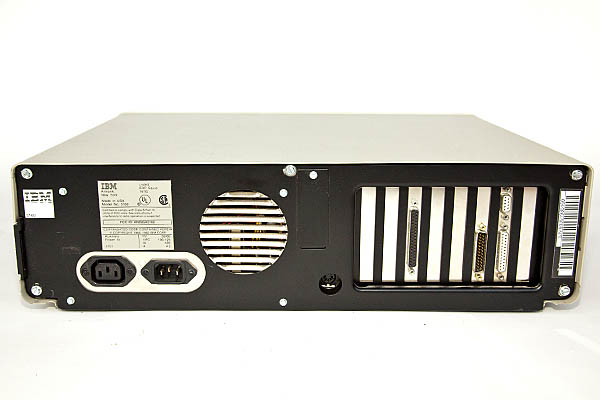
IBM PC XT back

I did plug it in and flip the power on.  Sounds like the hard drive spins up just fine at least.  I’m hoping that it works but I’m currently trying to hunt down an ISA VGA card to test it with.

You may ask why I bothered buying a nearly 30 year old computer.  My original plan was to part it out and build a single board 8088 to learn more about computers but I’ve since changed my mind since this one is in excellent shape.  I have a really cool old book called The 8088 Project Book by Robert Grossblatt.  It goes through the entire process of building up and programming an 8088 based computer on a breadboard.  The picture on the cover is an insane spaghetti mess of wires and breadboards.  Looks like fun but I’m not sure I’m up to the task.

My alternative plan is to use the computer as it sits an attempt to learn some 8088 assembly language in the dos environment.  Might also be fun to try some other operating systems like CP/M or Xenix if I could find copies of them.

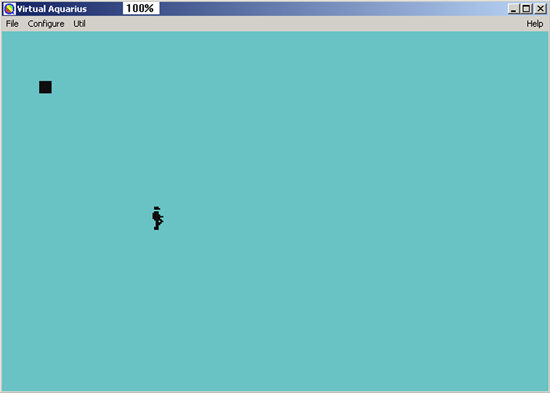
Original Running Man Program for the Mattel Aquarius

I’ve been playing with the first computer I received for Christmas when I was 5 years old.  It is a Mattel Aquarius.  It’s a bit obscure and was not well-received by the general public when it was new but I had many years of enjoyment from it and it really sparked my interest in computers.  Luckily I saved the manuals because there is not much documentation out there for it.  One of the first programs I entered when I was 5 was the Create A “Running Man” program.  I didn’t particularly understand how it worked back in 1983 but looking at it again, the concept is pretty easy.  It clears the screen and prints 2 stacked sprites that look like a man in one position.  Then it clears those sprites and prints 2 alternative stacked sprites one space over, then clears those.  Rinse and repeat.  To prevent the program from running so fast that you can’t see the man running, there is a subroutine called after the man is draw in a particular position that kills a bit of time.  Here is the original program:

10 PRINT CHR$(11)
20 FOR X=0 TO 38 STEP 2
30 A=12328+X+11*40: B=A+40
40 C=A+1: D=C+40
50 POKE A,21: POKE B,22: GOSUB 110
60 POKE A,32: POKE b,32
70 POKE C,23: POKE D,24: GOSUB 110
80 POKE C,32: POKE D,32
90 NEXT X
100 GOTO 20
110 FOR P=1 TO 30: NEXT P: RETURN

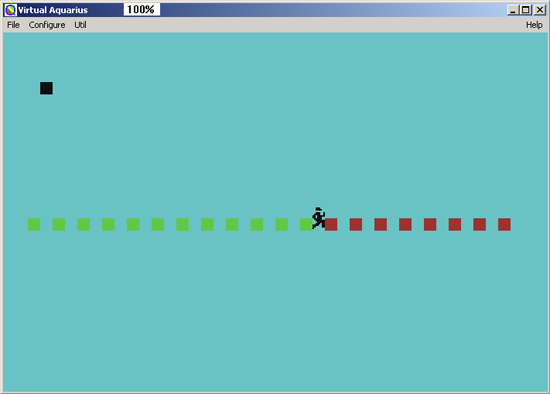
Modified Running Man Program for the Mattel Aquarius

I wanted to spice this program up a bit and add some color and variation.  I decided to make the man run at different speeds by randomizing the timer on the subroutine.  I added some color by having the man leave random colored rows of “dots” behind.  I know it’s not terribly innovative but I found the excercise amusing.  Here is the modified program:

10 PRINT CHR$(11)
20 FOR X=0 TO 38 STEP 2
25 IF X=0 THEN COL=INT(15*RND(1))
26 IF X=0 THEN SPD=INT(200*RND(1)+20)
30 A=12328+X+11*40: B=A+40
40 C=A+1: D=C+40
45 POKE B+1024,COL
50 POKE A,21: POKE B,22: GOSUB 110
60 POKE A,32: POKE b,32
70 POKE C,23: POKE D,24: GOSUB 110
80 POKE C,32: POKE D,32
90 NEXT X
100 GOTO 20
110 FOR P=1 TO SPD: NEXT P: RETURN

I’ve tested it on my real hardware and Virtual Aquarius now so it should work for you as shown.  If you have your own fun variations to this program or other fond memories of this computer, please post a comment down below.

Powered by WordPress. Theme: Motion by 85ideas.