Tag Archive: ms-dos


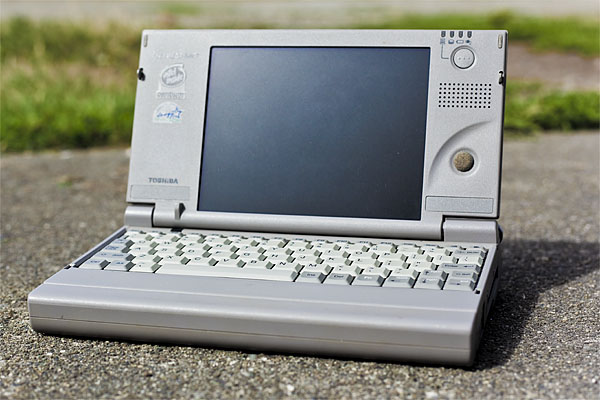
While it may seem pointless at first I actually have a halfway legitimate reason for going through the effort.  First off, of course, I wanted to see if it could be done and how usable it would be.  Second, I was sick of taking the compact flash card out of my Libretto 50ct and sticking it in my Mac to put new files on the system.  I figured it would be easier to punch up a URL and download the file directly.

Now that the “why” is out of the way, now we need to cover the “what”.  What you need is a wireless card that has MS-DOS drivers available for it.  There are a couple but for me, the easiest to find was an Orinoco Silver/Gold card.  Part of the reason I went with this card is that it is NOT cardbus.  It’s a 16-bit pcmcia card so it works in my Libretto 50ct.  The Orinoco card uses an Agere chipset so in theory this may work for other similar cards.  Once you’ve obtained your card, you will need the driver which is available on this server.  That little zip file on there contains everything you need.

Now for the how…  The first part can be a bit interesting.  After you’ve stuck your card into the laptop and unzipped the file, you are pretty much interested in two directories from the zip file.  First you’ll need to deal with what is in the CAD directory.  Read the readme.txt first and you will find out that you need to run MSD(Microsoft Diagnostics) and find a free location in memory to use as a base address.  In the readme, the suggest using:

/m=d000

However this didn’t work for me.  I found another location that was suitable and inserted a line similar to this one into my config.sys:

DEVICEHIGH=C:\DRIVERS\CAD\WVLANCAD.SYS /i=10 /b=1300 /m=b400

That is what worked for me, your mileage may vary.  Reboot your computer and see if that works.  By working, I mean not getting an error.  After that is done, you’ll need to deal with the files in the PACKET directory.  First you’ll want to edit the PACKET.INI file.  This may disappoint some of you here but you only have two options which are open or WEP.  Hopefully you have a WEP router that is off in the corner of your network where it cannot hurt anyone.  In the packet.ini file, you’ll want to set the following lines most likely:

Wireless_Network_Name = ANY (put in your ssid)

Station_Name = John Does Notebook PC (obvious)

;Enable_Encryption = N (uncomment and change to “Y”)

;Key1 = abcde (uncomment and put in your key.  Use “0x prefix for hex)

After these things are done and the file is saved, you can try out your settings with:

wvlan42 /L

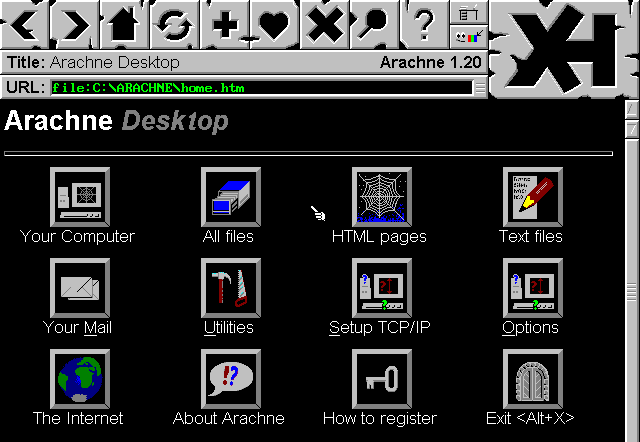
This should finally turn the light on your card on.  This means everything is probably working but it’s pretty hard to say at the moment because you don’t have ping or anything installed by default with MS-DOS.  Feel free to add that line to your autoexec.bat if you don’t want to have to worry about it in the future.  Now it’s time to download Arachne which is a fully graphical web browser for MS-DOS.  It’s the best one that I tested and the only one I could get to work.  Once you start up Arachne, you’ll need to set up some network settings.  The drivers above handle your layer 1 and layer 2 functions.  Arachne will pretty much handle the rest itself.  When I configured Arachne, I chose “Resident packet driver” and “bootp/dhcp”.  After that, you need to either restart or hit the “use new settings button.  If all goes well, you should be surfing like it’s 1999 all on your MS-DOS based laptop.

My Libretto doesn’t have a CD-ROM drive in it.  Sure there is an external drive that I can plug in and run but why would I want to haul around a drive that is almost as large as the whole computer just to play some old game that requires a CD-ROM drive to function?  Many of the old CD-ROM games are around 10mb anyways so it makes no sense to use a CD-ROM drive for them.  Even on a desktop, do you really want to monopolize your CD-ROM drive with a disk just to play one game?  I figured that someone out there must have a solution so I found one.  The problem was that I couldn’t find any documentation, just odd hints scattered across the web.

The program you need is SHSUCDHD and SHSUCDX.  These are part of a package called SHSUCD that is available here.  The whole package is pitched as a replacement for mscdex but the feature I’m interested in is just the emulation.  What’s nice about it is that it doesn’t require any TSR’s in your config.sys file.  You can either start it on demand or in the autoexec.bat file.  My goal was to run Wizardry 7: Crusaders of the Dark Savant.  So I put a chain of commands into a batch file that I run when I want to start that game.  The lines related to SHSUCD are as follows:

shcdhd86 /f:wiz.iso

shsucdx /d:shsu-cdh

This assumes that SHCDHD86 is in the same directory as wiz.iso.  SHCDHD86 is the same as SHSUCDHD if I’m not mistaken so hopefully that isn’t too confusing.  The first lines points the virtual cd-rom driver at the iso you wish to mount.  The second line specifies what drive letter bind the image to.  After all of this is done, you should be able to go to the D:\ drive and there will be the contents of your ISO.

In my spiffy batch file, I put commands to unload the cd-rom drivers after the game is done using them:

shsucdx /u

shcdhd86 /u

My final assembled XT-IDE 8-bit ISA card

Once I started messing with my IBM PC XT, I realized that there were things I had taken for granted all along since my first PC compatible system was a 386.  I didn’t realize that IDE uses a 16-bit bus and it would take some trickery to use an IDE device in an older 8-bit system like the XT.  I searched around and found that there were in fact 8-bit ISA controllers but they were expensive and rare.  Finding one these days would be a stroke of luck or a dent in the pocket book.  I was about to design my own when I came across the XT-IDE project.  The XT-IDE project is an open source venture where a group of people designed exactly what I needed with fairly common off-the-shelf parts.  I had my friend James to burn the code onto the eeprom for me  because I have no way to put something on a 360K floppy disc but aside from that, the project primarily consists of easy through-hole soldering.

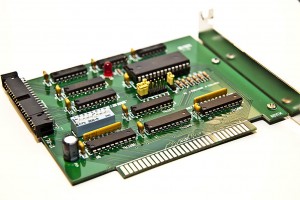
Front side of the unpopulated XT-IDE PCB

I ordered my board the other day from Andrew Lynch who can be found lurking in this huge forum thread.  It was $14 including shipping which I felt was more than fair considering the quality of the board.  It’s a very professional dual-sided PCB with a full solder mask and silkscreen.  It would take me far too much time to attempt to replicate this at home.  It’s also nice that it has all of the settings printed VERY clearly on the board and the url for www.vintage-computer.com so I won’t forget where I found this project.

The bill of materials looks a little daunting at first but it’s really not a huge project.  The list below references Jameco part numbers.  There are a few non-critical items and some others that you can pillage from other ISA cards such as an L-bracket, pan screws and shorting blocks (jumpers).  I’m personally going to skip using most of the sockets since I’m fairly confident with my soldering skills and dual-wipe sockets tend to add another point of failure.

1               XT-IDE PCB (get this from Andrew lynch)
10   25523 	CAP,MONO,.1uF,50V,20%
1    1945428 	CAP,RADIAL,47uF,35V
2    45129 	IC,74HCT688
1    46316 	IC,74LS04
1    46607 	IC,74LS138
1    47466 	IC,74LS32
1    287144 	IC,74F245,DIP-20
3    282642 	IC,74F573,DIP-20
1    74827     	Atmel EEPROM IC, 28C64
2    112214 	SOCKET,IC,14PIN,DUAL WIPE
6    112248 	SOCKET,IC,DUAL WIPE,20PIN
1    112272 	SOCKET,IC,DUAL WIPE,28PIN
1    526205 	SOCKET,IC,16 PIN,390261-4
3    112432 	SOCKET,SHORTNG BLKS,RED,CLSE
1    690662 	RES,CF,150 OHM,1/4 WATT,5%
6    691104 	RES,CF,10K OHM,1/4 WATT,5%
2    857080 	MOLDED SIP,9PIN,BUSSED,10K,2%
1    333949 	LED,GREEN,572NM,T-1 3/4
1    1939562 	SWITCH,DIP,SPST,8-POS,16-PIN
1    53604 	HEADER,RT MALE,2RW,40 CONT
1    109568 	HEADER,.1 ST MALE,2RW,16PIN
1    109576     HEADER,.1 ST MALE,1RW,3PIN
2    2094389 	SCREW,PAN HEAD,PPN4-40X1/4
1    N/A        Keystone 9202 ISA bracket with 2 PCB mounting tabs.

Once I had all of the parts together, it was time to check out the build instructions.  This project is a VERY easy build.  All of the IC’s are labeled on the PCB, all of the caps are identical except one which is labeled and called out and all of the resistors are the same aside from the one that goes with the LED.  There are only two gotchas that I can think of.  First off, before you solder in the 40 pin IDE connector, you should pull the key pin out from the connector.  Grab an IDE cable and line it up with your connector, you will see which one is the key pin fairly quickly.  Secondly, the default dip switch setting is correct on the back side of the PCB but incorrect in the build instructions.  Set it to 01110111 as stated on the back of the card.  If you need to set this to a different setting, you will need to re-flash the firmware on the eeprom for some reason.  The default seems to work fine however so no big deal.

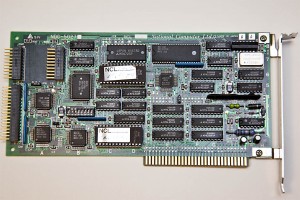
The original NCL MFM controller that came in my PC XT

Overall this project has cost me about $30.  I’ve learned some new stuff and I can now use my IBM PC XT with a modern IDE hard drive.  My next step will be to try to use the system with a compact flash card.  Now I can install MS-DOS 6.22 and hopefully Xenix at some point without disrupting the original MS-DOS 3.2 file system.

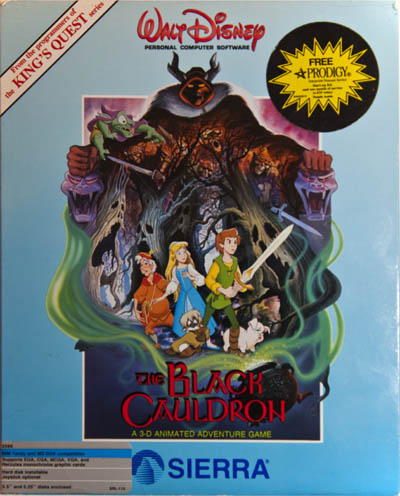
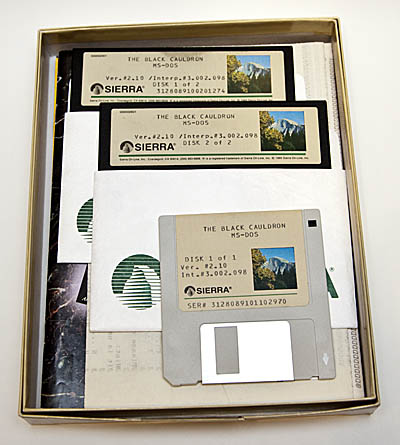
I was at the thrift store the other day and scored a copy of Disney’s Black Cauldron game made by Sierra On-line in their glory days of text/mouse based adventure games. When I first got an IBM compatible system back in the 90’s, the Sierra games were by far my favorites.  They were always consistent, always fun and sometimes a challenge to get running properly which was also fun.  This particular game was released in 1985 although this particular copy was printed and sold in 1989.  According to the box, the system requirements are very very low.  It requires 256k of ram, vga, ega, cga or hercules graphics and a keyboard.  Mouse or joystick optional.

I opened up the packaging and was pleasantly surprised to find both the 5.25″ floppies and the 3.5″ floppy.  There were several other goodies inside as well including the manual, the tenth anniversary Sierra catalog and the original Prodigy Network trial offer which brings back many fond memories.  Another prize buried in this box was a hint guide that someone painstakingly downloaded via dial up and printed on a dot matrix printer.

Using a little forensics, it’s obvious to me that this game was played a lot but taken care of meticulously.  The computer it was used was probably late 80’s technology based on the fact the previous user obviously used the 5.25″ disks and most likely played the game straight off of the disk.  There is a characteristic fingerprint/smudge at the top of disk 1 but not on disk two.  I’m guessing the owner played through the game as far as they could get which took them a while.  They probably never made it to disk 2 on their own.  That’s when they resorted to printing the hint guide.  They played through the rest of the game, cheating with the hint guide to beat it in the matter of a couple hours.  After they beat it, they put the game away for 20 years and someone finally donated it to the thrift store.  All of this only leaves one question in mind: Will this game actually work on my PC XT after sitting in a box for 20 years?

Well much to my pleasure, it decided to work!  I put in disk 1 and ran the install script:

install c:

The 30 year old floppy drive sprang to life and copied the disk to the hard drive.  Disk 2 went just as well.  The installer left me in the c:\sierra directory and told me to type:

bc

This is obviously an updated version of the game since the older Sierra games had much cruder install scripts.  Anyhow, I started the game up.  Obnoxious 8-bit PC speaker music came blasting out.  Sad that the IBM’s didn’t even have sound as good as the C64.  I turned the music off with F2 and could then study the glorious 8-bit graphics.  This must have been an amazing game in it’s day.  As far as the sierra line up, I would say the graphics are similar to Space Quest 1, Kings Quest 1, etc.  The game play is much different however.  This game is geared toward younger players so it requires no typing at all.  Instead you use the F-keys to DO, LOOK, USE, etc.  It’s a good concept that Sierra didn’t fully develop until the days of King’s Quest 5, Space Quest 4, etc.

I tend to like both styles of the Sierra games for different reasons.  I plan to play this one through at some point and see what it has to offer.  Go check out Abandonia for much more information, screen shots and a download for the Black Cauldron.

Dusting off my new old IBM PC XT

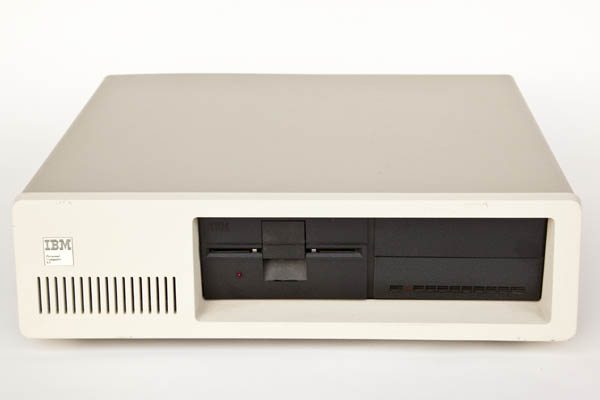
IBM PC XT front view

I was at a computer recycler the other day and there it was… An original IBM XT 8088 system in nearly mint condition.  It was in the front window of “prized” old crap in this store.  I asked the guy if any of that stuff in the window is for sale and he replied, “sure, sometimes it is”.  So then I specified that I was interested in the XT.  He asked what I’d pay for it and I told him $20.  He said, “sure” and it came home in my trunk.  Luckily on the way out the store I noticed the keyboard sitting there.  I asked him if it was cool if I took it and he said it wasn’t a problem.  Later I found out that it’s a good thing I grabbed it because an AT-style keyboard wouldn’t work.

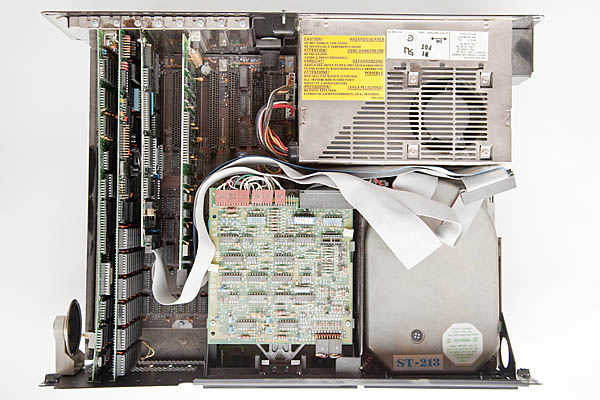
IBM PC XT inside

After bringing it home, brought it out and popped it open to check what was inside.  The system is actually fairly packed.  Someone probably spent $5,000 or so upgrading it to the point it was at.  The memory banks were full and there was an add-on memory card that had a realtime clock as well. Something else I learned was that originally these systems required you to enter the time and date every time you booted them up.  How annoying….  Looking around further, the system has an unmarked graphics card with a printer port.  I would have hoped it was a Hercules but I’m pretty sure it’s not a real one in any event.  There is a 20 megabyte Seagate MFM hard drive and a MFM controller card in there too.  Something else I learned is that IDE pretty much requires a 16-bit data bus to function at all and the 8088 has an 8-bit external bus so it can’t work with IDE without some major trickery so I’m crossing my fingers that the MFM drive still functions.  Lastly, there is a serial port card.

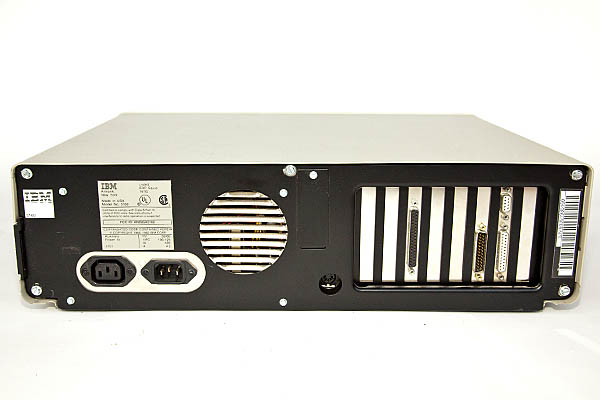
IBM PC XT back

I did plug it in and flip the power on.  Sounds like the hard drive spins up just fine at least.  I’m hoping that it works but I’m currently trying to hunt down an ISA VGA card to test it with.

You may ask why I bothered buying a nearly 30 year old computer.  My original plan was to part it out and build a single board 8088 to learn more about computers but I’ve since changed my mind since this one is in excellent shape.  I have a really cool old book called The 8088 Project Book by Robert Grossblatt.  It goes through the entire process of building up and programming an 8088 based computer on a breadboard.  The picture on the cover is an insane spaghetti mess of wires and breadboards.  Looks like fun but I’m not sure I’m up to the task.

My alternative plan is to use the computer as it sits an attempt to learn some 8088 assembly language in the dos environment.  Might also be fun to try some other operating systems like CP/M or Xenix if I could find copies of them.

Powered by WordPress. Theme: Motion by 85ideas.