Tag Archive: Bash


I was listening to the pauldotcom.com security podcast the other day and heard then talking about netcat.  This peaked my interests and got me thinking that I should be able to print text files from any Unix-based system on which netcat could be installed/compiled.  At first I tried it the simple way:

cat file.txt | nc 10.10.10.201 9100

This did indeed send the file to the printer’s port 9100.  There were two problems though.  First off, the printer asked me if I wanted to print the buffer or wait until it was finished printing.  Pushing the button on the printer made the file print but is not as convenient as it should be.  This problem can be fixed with a “-w1” switch.  This tells netcat to quit if the input stream is idle for more than 1 second.

cat file.txt | nc -w1 10.10.10.201 9100

This prints the text file almost instantaneously but there is another problem.  All the text is stair stepped.  As it turns out, Unix uses only newline character at the end of each line.  In dos and apparently network laser printers, a newline and a carriage return are two separate things that need to be handled individually.  A little bit of sed trickery is just the thing to fix this problem.

sed ‘s/$'”/`echo -e \\\r`/” file.txt | nc -w1 10.10.10.201 9100

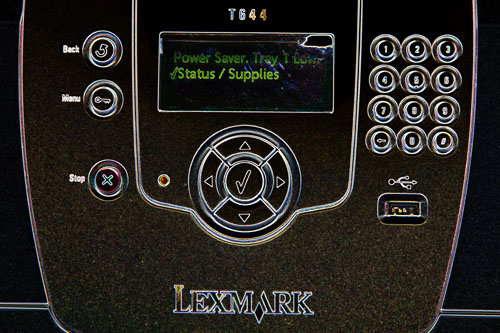
Obviously you will need to put your own printer’s IP address there.  This will probably only work with a decent networked laser printer.  I’ve tested this with my Lexmark Optra T644 and it works great.  Special thanks to rkdavis for helping sort out the sed bits.

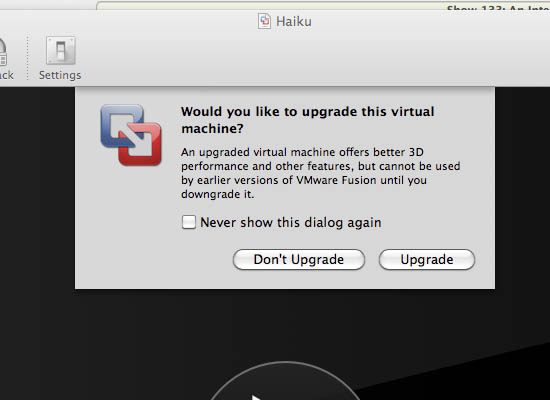
Feeling brave today, I decided to click the “upgrade” button this time when I started up Haiku.  I’m running VMWare 3.1.0 so I’m referring to when I start up VMWare and it asks me if I want to upgrade the VM to use newer features of 3.1.0.  The warning is that it will no longer work in older versions of Fusion once I push this button.  This is an acceptable risk to me since I don’t have any older versions.

When I first pushed the button, it was very uneventful and the dialog simply disappeared.  Maybe 15 seconds later, another one appeared asking if I’d like to replace my serial output file “serial-port.txt” since one already existed.  Sure why not?

After that, it took about 30 seconds and booted right up like nothing happened.  That’s a win in my book.  Time to break stuff…

First I’ll take a snapshot.  WOW!  By far the quickest snapshot I’ve ever taken of anything!  This only took all of 5 seconds.  On windows, I’ll get up and take a coffee break while I’m waiting for snapshots to finish and when I want to rollback I’ll stick that on before I go to bed(j/k, it’s not quite THAT bad).  A snapshot is no good of course if it can’t be restored sooooo let me test that out right now….twenty seconds later, it’s restored.  Oddly, it did ask me again if I wanted to replace the serial-port.txt file again.  Oh well, I don’t really care at this point.

Let’s try some peripherals.  A serial port oddly comes to mind.  The one I tried has a prolific chipset in it so nothing too exotic.  When I hooked it in via the VM, nothing happened.  No error, no message, no noise…nothing.   Doing a quick browser of the applications that come pre installed, I didn’t see anything resembling hyper terminal and from the command line, no minicom either.  Oh well, no huge surprises here.
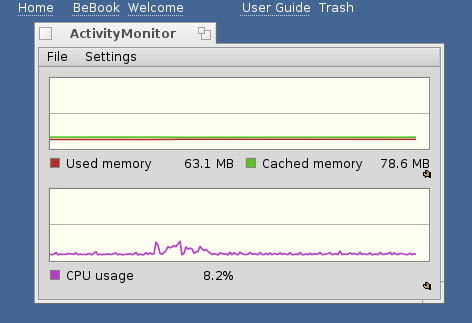
While browsing for a program that could communicate with the serial port, I DID come across the activity monitor.  This thing is very impressive.  It refreshes several times per second and is very responsive.  On my system, it averages about 9% CPU usage and pegs at 64.2MB of ram.  That is LOW comparing to OS X that hogs up well over 512MB right on boot up.  Opening a terminal in Haiku brings the memory usage up to a whopping 72MB of ram in use.  8MB of ram for a terminal?  I can accept that.  OS X takes 10MB or so for me.  Bash is a bit of a pig from what I understand though so this can probably be optimized by using a different shell.

Next I noticed the “find” option in the menu.  In the couple of years I’ve had my Mac, I’ve become completely spoiled by the spotlight tool I have to admit.  I love having the results to my search show up as I find them.  But on the same note, I couldn’t POSSIBLY expect that kind of behavior out of an OS that will run on super light weight hardware.  That being said, I found the search to be really snappy.  I searched for “terminal” and had the results in less than 2 seconds.  I’d have to fill my poor system with a LOT of junk to really put this feature through it’s paces but I like what I see so far.
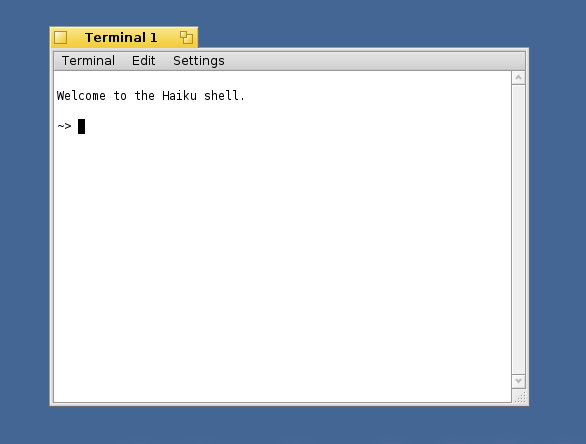
Haiku Terminal

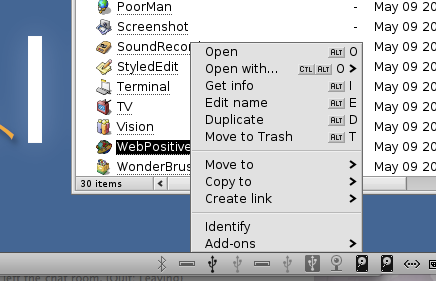
Lastly, I want to create a WebPositive icon on my desktop.  As I mentioned in another post, I tried right clicking the icon in the Tracker and tried dragging the icon from the Tracker as well and that didn’t do the trick.  Next thing I did was to click “applications” in the tracker.  This gave me a directory listing so I dragged the icon out of there but then it was gone from that menu.  Hmmm…  I dragged it back and now tried to right click on it in the directory listing.  Voila!  That seems to have worked but it presents me with a somewhat overwhelming list of options that sound like they would do the job.  There is “copy to” which I probably don’t want to use since I’m assuming it would copy the entire application.  Then there is “duplicate” which made a copy of the entire application(or shortcut in this case) in the same directory.  Finally there is the “create link” which opens a sub menu allowing the link to be sent directly to a myriad of locations including the trashcan!?!  Why would you want to create a link in the trashcan?
Now that I have my WebPositive icon, I want to see how much ram Haiku’s web browser takes.  Keep in mind this browser does not support Flash and presumably a couple of other features but I DID jump into Google Docs and saw no problems at first glance and it seemed very responsive.  I did notice something else cool about Haiku in the course of this.  I opened up the ActivityMonitor and at first the ram was sitting at 122MB but as I’m typing this, I’m watching the ram usage count down and the cache usage count up.  It’s actively moving active ram into cache as I’m allowing it to idle.  Less than 2 minutes after I’ve stopped using the program, the active ram is down to 95MB of usage.  To me these is really nice and a refreshing change from Windows where applications tend to continually eat more memory.  When I click on WebPositive again, all the cache pops back into memory instantly and the usages goes back up to 120MB.  If I open up another program instead, the ram is free for that new program to use.  Everything in the background seems to get counted off into cache.

This second look at Haiku has given me far more appreciation for the effort the developers have gone through to make a compact and efficient, yet modern operating system.  I wish the other vendors would take a few hints to see how it’s done.
Sometimes you come across a need to troubleshoot a misbehaving script or program things roll by on the screen too quickly.  The other day, I was troubleshooting a script that was blurting out an error and then continuing to open up a “dialog” screen which redraws the entire screen and clears the error.  I needed a way to send just the errors to a logfile.  If you are familiar with C programming, you’ll realize that there is STDOUT which writes to the console.  There is also STDERR which usually writes to the console but cannot be captured with a standard redirect such as:

program 1> logfile.txt

You’ll capture the STDOUT of that program but not any errors.  If you want just the errors, you’ll want to use:

program 2> logfile.txt

If you want to grab both the errors and the STDOUT, you can use:

program &> logfile.txt

This is a nifty trick you can use to impress your friends.  Imagine you have some smallish program that you want to wrap up into a single file for simplicity.  Part of final output perhaps relies on a clever bit of shell scripting and another part relies on a binary of some sort that you need to get the job done.  Here’s a way to wrap it all up in a tidy little package:

#!/bin/sh
grep SRC: $0 | grep -v “grep SRC:” | sed -e s/SRC://g > /tmp/hello.c
gcc -o hello /tmp/hello.c
./hello
exit
SRC: #include <stdio.h>
SRC: int main(int argc, char *argv[])
SRC: {
SRC: printf(“Hello World\n”);
SRC: return 0;
SRC: }

Everything below exit is completely ignored by your shell.  The grep statement goes through the shell script line by line and returns the all the lines starting with “SRC: ” to sed.  Sed uses a simple regex to strip the “SRC: ” off your source code and sends the output to a file in your /tmp directory.  Then the file is compiled and ran.  You could go further and delete the source file out of the /tmp directory if you like or don’t bother.

My last article is nice for checking for a few dependencies in a shell script but if your user has to keep running your script and then go back and install something and run it again, this can get very tiresome.  It’s much nicer to give your user a big list of deps they need to install in one shot.  Here is some code to do just that.

failed_dep=0
if ! which pkg1 > /dev/null; then
echo “Please install pkg1 or make sure it is in your path”
failed_dep=1
fi
if ! which pkg2 > /dev/null; then
echo “Please install pkg2 or make sure it is in your path”
failed_dep=1
fi
if ! which pkg3 > /dev/null; then
echo “Please install pkg3 or make sure it is in your path”
failed_dep=1
fi
if ! failed_dep==1; then
exit
fi

Obviously remember to change the “which pkg” to the dependency you are looking for and change the echo statement to reflect this as well.  Just keep adding if blocks if you need to check for more than three packages.  If you have a LOT of dependencies, your end user will thank you for using this method.

Almost every shell script written depends on something else.  Many times those things are already on your computer.  Basic stuff like cat and echo are arguably on every unix distribution in the known universe.  Other things start to vary more widely between different distributions.  Stuff like dialog or perhaps even perl may not be on your system.  Especially if it’s a compacted or embedded system.  To give your shell script a nice polished feel that makes it more portable and easier to use, you should add a couple of lines of code to check and make sure any extra items are there first.  Here is an example that checks for :

if ! which perl > /dev/null; then
echo “Please install perl or make sure it is in your path”
exit
fi

This will help people quickly determine why your script is failing to run on their platform.  Futhermore, it will save you support emails and save users of your script frustration.  Especially if they are newer users who aren’t accustom to debugging scripting glitches.

Hello, world is the most basic of all test programs.  It’s one of the first steps to determine if you have your development environment set up correctly and is also a good first program to learn in any language because it will give you a good idea of the bare minimum requirements to build a program in a given language.

BASIC

Let’s start with Hello, World in basic since that was the first programming language I ever encountered.  The code is very simple:

10 PRINT “Hello, World”

RUN

10 is a line number which is a requirement of old basic compilers.  Generally the lines are numbered  10, 20, 30, etc although they don’t have to be.  Part of the reason for this is so you can later insert other line numbers into your code without renumbering all of your lines of code.  Newer BASIC implementations have sub-routines and other features have have allowed them to ditch the line numbers.  The program is executed from top to bottom so everything in basic has to be in order.  The command RUN at the bottom runs the program and will display your text.  It is not actually part of the program.

Ruby

In Ruby, there are two easy ways to do a hello world program.  I’ll assume you are using a Unix-based machine to try this example.  You’ll need to create a text file called hello.rb with a text editor.  The first way is:

puts ‘Hello, World’

Save your file and type ruby hello.rb at the command prompt.  If all went well, it should print Hello, World and then give you back your command prompt.  I’m assuming that you have installed ruby and it’s in your path.  On a Debian system, it’s easy to install ruby if it’s not already there.  Use a command such as sudo apt-get install ruby.  The other ruby hello world example is:

print(“Hello, World\n”)

C

Hello, World in C is far more complex than any of the other examples.  This is because C is highly structured and not very forgiving.  It also doesn’t have the printf function in the core language so the standard input and output library must be included.  I will also assume you are using a Unix environment for this example.  If you try to run this in a dos/windows environment it will probably fail.  Here is the hello world code in C:

#include <stdio.h>

int main(int argc, char *argv[])
{
printf(“Hello World\n”);
return 0;
}

To run it, you’ll need to put the code in a text file called hello.c.  Then type in gcc hello.c at the command prompt.  This should generate a file called a.out.  At the command prompt, type ./a.out to run the program.  Different compilers and environments may give different results.

Bash

The last example I’ll give is for bash scripting.  Some people would argue that bash is not a programming language but nevertheless it’s a very powerful way to accomplish tasks with other programs and it’s a good way to automate repetitive tasks.  Here is hello world in bash:

#!/bin/sh

echo “Hello, World”

To run this you could simply type the bottom line at the command prompt.  Instead, save it to a file called hello.sh.  Now before you run it, you’ll need to set the executable bit.  Type chmod 755 hello.sh at the command prompt.  Now you can type ./hello.sh to execute the script.

Powered by WordPress. Theme: Motion by 85ideas.