Category: retro


During the holiday season here I had some time to tackle some of the projects that have been on my todo list for ages.  One of these projects was improving the video output from my Aquarius.  Last time I hooked it up, the picture was pretty horrible.  It may have been a flaky RF switch box but an RF modulated video signal isn’t really ideal in the first place.  Searching around, I found some schematics for the Aquarius so I thought this project would be a piece of cake.

Here is the offending RF modulator

Here is the offending RF modulator

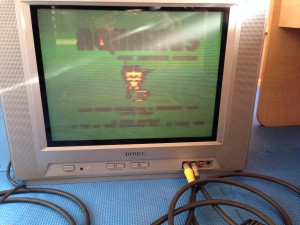
It appeared to be a simple matter of removing the RF modulator from the board and then grabbing pin 1 and feeding it to a RCA jack and feeding pin 3 to another for sound.  When I did that though, I got video like this:


Wrong colors, smearing, illegible text.  Yuck!

Wrong colors, smearing, sync loss, illegible text. Yuck!

It was at this point that I realized the project might not be as easy as I first thought.  I decided that the problems was a weak signal so I set out to try to amplify it.

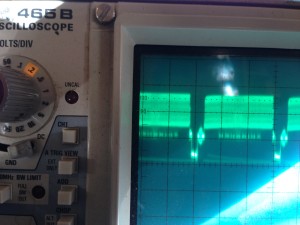
I was a little puzzled as to why such a weak signal worked fine for the RF modulator but not for the TV.  When I looked at the signal on a scope, it looked fine:

This is the unloaded signal straight out of the TEA1002 chip with the two resistors in place.

This is the unloaded signal straight out of the TEA1002 chip with the two resistors in place.

But then when I put a resistor across the signal to load it down, it squashed down to nearly nothing.  Apparently the RF modulator doesn’t have much of a load at all since it has no 75 ohm cable termination to deal with.

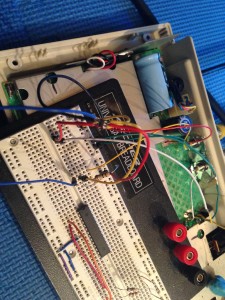
I unsuccessfully tried a couple of single transistor emitter-follower circuits such as this NES Video Booster circuit that I found.  While it improved the signal, it didn’t entirely fix the problem.  My friend suggested a purpose built video buffer chip such as the MAX4090.  Oddly, he had a roll of 200 of them laying around that he never found a use for.  I hooked it up on my breadboard to check it out:

Breadboarding an SOT23-6 packaged chip was a small challenge but certainly not impossible.

Breadboarding an SOT23-6 packaged chip was a small challenge but certainly not impossible.

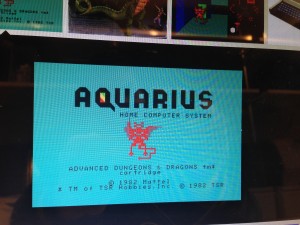
That's more like it!  (Ignore the moire pattern from my cell phone cam)

That’s more like it! (Ignore the moire pattern from my cell phone cam)

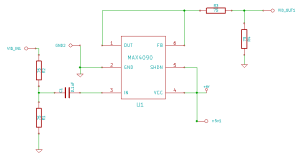
Success!  That worked pretty well.  I started with the reference circuit found in the MAX4090 datasheet but found that it worked best with only the one cap installed on the output.  I omitted all of the resistors from the circuit and the decoupling cap on the vcc.  Just in case though, I designed my PCB off of the reference schematic:

MAX4090 Breakout Board Schematic

MAX4090 Breakout Board Schematic

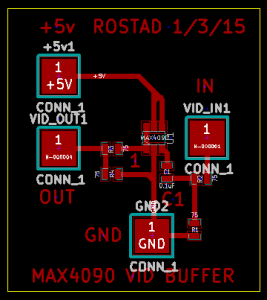
Here's my Kicad layout for the breakout board.

Here’s my Kicad layout for the breakout board.

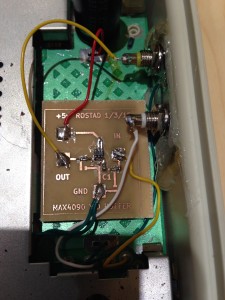
Here's the breakout board installed in the Aquarius.  Fits where the RF modulator was.

Here’s the breakout board installed in the Aquarius. Fits where the RF modulator was.

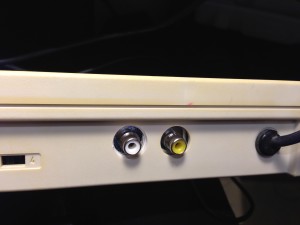
IMG_1977

This is how it should have looked from the factory the day it was shipped!

In case you are wondering about the red +5v line, I got that from the bottom of the board.  The 5v regulator line is very clearly marked on the solder side over near where the three wires from the regulator go under the metal shield.  I just followed it as close to the former location of the RF modulator and grabbed it there.

Asteroids Free Play part 1

asteroids

I knew it wouldn’t be long until another weird arcade issue surfaced.  This is one that has been troubling me since I worked on this machine.  The Airlock picked up a non-functioning Asteroids for fairly cheap a short while back.  Round one of fixing led James (with not much help from me) to bad ram chips.  Once he popped those in, the machine seemed to work until a week later when it didn’t.

During that entire week, the machine was left on freeplay as are most of the newest games when they first come into The Airlock while they are still in the functional testing phase.  The game died and so I took the board home and laid a mile of solder on it to fix all the questionable joints.  I also cleaned up and reseated a bunch of shaky looking roms in nasty wiper sockets.

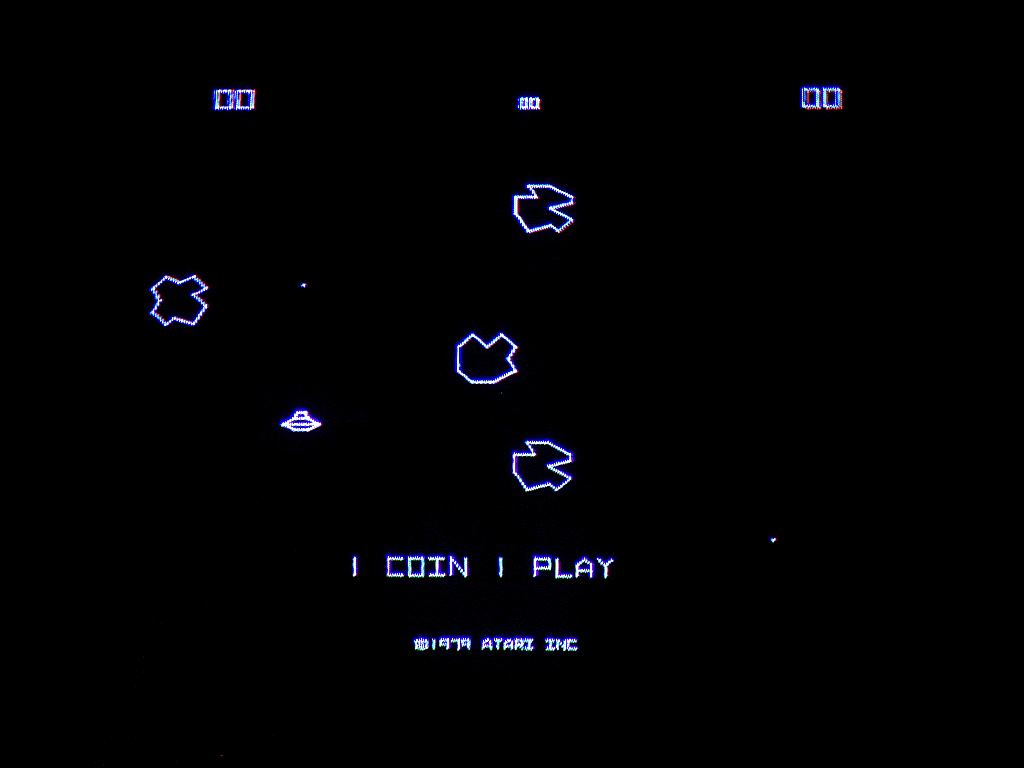
When I popped the board back it, after a little bit of finagling, it fired right up… in German.  Not a problem, we tweaked up the dip switches and it was good to go.  We didn’t notice the latest problem until we tried to switch it off of freeplay mode.  Flipping the switch made the screen change to “1 coin, 1 play”.  Problem is that when you put in a coin, then play a game, after the game is over, both start lights are flashing as if there are credits on the machine.  Because there are.

We’ve had other bigger priorities to deal with so this was back burnered but I was out there tonight and by pure fluke, my dad called me.  I tend to pace around when I talk on the phone so I paced and walked by Asteroids and hit several of the buttons.  No one had played the game today because The Airlock was closed for a private party who was there only for Battletech.  After I hit the buttons, I noticed that the credit lights were now flashing.  Very curious.

I expect that the problem is that something is cross-wired in the coin door/control harness.  For instance, something may not be grounded properly or what someone thought was a ground is actually another control line and they have tied it together.  Kelly suspects that there is probably a short circuit on the logic board itself.  Maybe I got too carried away with fixing those solder joints?  Who knows.  When we figure it out, I’ll post our discoveries.

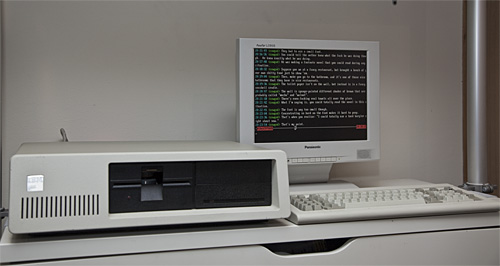
IRC on my (nearly) 30 year old PC XT

I recently had the urge to fire up my IBM PC XT.  The challenge usually is to do something interesting on the machine.  Playing games slower than my Libretto 50CT or using Microsoft Word 1.0 is not especially interesting to me but hooking it up to my network and chatting on IRC… that’s more like it.

I have had this thought in the back of my head for a while.  I knew it was possible to put it on a network but finding an 8-bit ethernet card is challenging.  Not only are they super rare but on eBay now they are super expensive.  I’m NOT paying $100 for a network card for a computer I only paid $20 for in the first place.  As a rule, I’ve kept my retro computer hobby cheap so I wasn’t about to make an exception here.

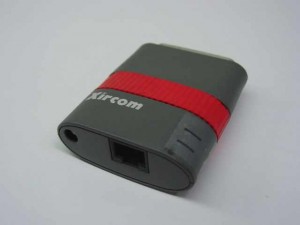
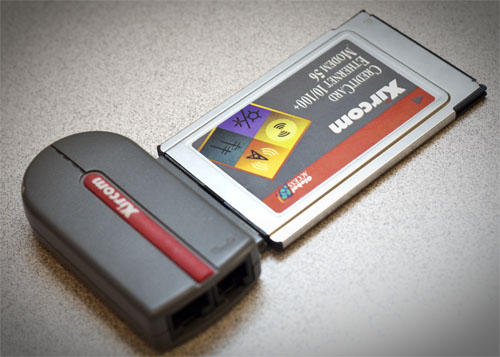
In retro computing, patient generally equals cheap.  This case was no exception.  Someone on one of the IRC channels I hang out on randomly asked me if I wanted another Libretto.  Of course I do!  Any Librettos will find a good home here.  This person graciously sent me not only a nice Libretto 70CT but also a bunch of accessories including a Xircom PE3-10BT pocket ethernet adapter.

This is something I had NO idea existed.  It is an ethernet adapter that hooks up to a parallel port.  It also has a short PS/2 keyboard pass through cable that supplies power since parallel ports don’t have power in their specification.

This left me with two problems on my XT.  First off,the XT has no where to plug in a PS/2 keyboard and second, while I have a parallel port on my AST Six Pack Plus expansion card, the pigtail for it is long gone.  The previous owner probably never installed it in the first place even though MSD(Microsoft Diagnostics) showed that the port was activated.

I poked around online a bit and saw that 8-bit ISA parallel port cards are a whopping $30.  No thanks.  I poked around my garage and found a 16-bit ISA controller card.  This one was just like the 100’s that I installed when I was building clones (as a profession) back in the 386/486 days.  Now I know there is no chance that the IDE bus would work in an 8-bit ISA slot but I thought there was a good chance that the parallel port would work so I jammed the 16-bit ISA controller in the 8-bit card slot and let the extended part of the bus hang over the slot.  I disabled EVERYTHING on the controller except the parallel port.  Lucky enough, I fired up the computer and it showed up in MSD as a bidirectional parallel port.  Yay!!

The next challenge was getting power to it.  I ended up building a very convoluted adapter that went from PS/2 to AT to a hacked midi cable and then to a hard drive Y-cable.  It’s ugly but it works flawlessly.  When I get the proper connectors, I will build something proper.

After that, there was nothing left to do but fire it up and snag the software for it.  First off I needed a packet driver for the Xircom card.  Since Intel bought Xircom many moons ago, they still have the drivers available on their website.  (Xircom PE3 Driver).  So after you unpack the driver, you simply run PE3PD.EXE and it will work if all the hardware is in order.

Second, you need a TCP/IP stack and some applications.  This is solved by the mTCP project.  This project has a DHCP client, Telnet, FTP Client/Server, IRC, Ping, Netcat, an NTP client and a WGET clone of sorts.  One of the most surprising things to me was that this project is still extremely current.  As of this blog post, the last update was October 29th, 2011.  Even if there is never another update though, I’m fairly impressed with what I see.  The IRC client, IRC JR, works flawlessly after you set up the config files which is well documented.

I could use this machine as a terminal for one of my more powerful machines as something mundane like a clock but being able to hook it up and use it as a well-equipped IRC client is fairly pleasing and gives me many more excuses to fire up my XT in the future here.

This picture intentionally left blank 😉

This is a continuation of my instructions on installing Gentoo on the Libretto 110ct.  After I got xorg-server running properly, I noticed that screen blanking and LCD powerdown did not work correctly.  They produced very strange effects and did not ultimately blank the screen or power down the backlight.  This is an old computer but I intend to leave it running constantly so I want to make sure to preserve the life of the backlight as long as possible.

First off, make sure the Toshiba experimental ACPI driver is compiled into the kernel.  It’s included by default in the 3.0 and many of the earlier kernel versions.  Then you’ll want to grab toshset.  Toshset is the key to this whole process.  You can test the driver by typing:

cat /proc/toshiba

You can test it further after installing toshset by typing:

toshset -q

If all that stuff works, you are ready to move forward.

I searched the Internet high and low and could not find what I needed.  What I wanted was something extremely light weight that would use the hooks already built into xorg-server to invoke toshset.  I still feel like this must be possible even though we went a different direction.

In my search I came across exactly one person on the Internet who sounded like she ran across the same problem as me.  On her page she said:

“So what if you really do want your backlight to turn off after a specific interval? There doesn’t seem to be a way to get Xorg to do it directly. But you can cheat: Write a script that calls vbetool dpms off. Then set that script to be your screensaver. “

Sounded close, so after more searching I finally gave up and emailed Akkana and asked her how she did it.  Turns out she didn’t remember but after a couple of email exchanges, we came up with an idea together of how to do this pretty easily.  I had the idea to use a python script to poll the mouse and keyboard nodes out of ‘/dev/inputs’.  I was really pleased when Akkana emailed me back the next day and said something like “Ya, good idea, here it is!”

She sent a script that monitored the everything in ‘/dev/inputs’ and then invokes a system command(whatever you specify) when the idle time counts up to a certain point.  I modified the script a bit so that it would also run another program when activity in those nodes is detected.

When the screen is not blanked, the polling interval is 5 seconds to keep things REALLY light weight.  I tweaked it to up the polling interval when the screen is blanked to 5 times per second so there is no perceivable lag when waking up the screen.

Did I mention this script is REALLY light weight?  It doesn’t even show up in top when it’s on the 5 second polling interval.  (I haven’t ssh’d in yet to check the .2 second interval yet).  So after all that buildup, here’s the script:

#! /usr/bin/env python

# idlerunner -- run a screensaver-type program when input devices are idle.
# By Akkana Peck, akkana  shallowsky (dot) com
# based on an idea from Geordy Rostad, geordy  hotmail (dot) com
# Copyright 2011, please re-use, share and improve under the terms
# of the GPLv2 or later.

import sys, os, select
import time

# how long to wait before firing the screensaver:
TIME_THRESH = 60 * 5   # seconds * minutes

# Global polling interval
interval = 5

# Read from every /dev/input device:
INPUTDIR = "/dev/input"
inputdevs = []
for devname in os.listdir(INPUTDIR) :
   try :
       inputdevs.append(open(os.path.join(INPUTDIR, devname)))
   except :
       pass
#      print "Not watching", devname
# uncomment for troubleshooting ^^^

last_event_time = time.time()

while True :
   time.sleep(interval)
   inp, outp, err = select.select(inputdevs, [], [], .5)

   if not inp or len(inp) == 0 :
       # we're idle! But for how long?
       idletime = time.time() - last_event_time
       if idletime > TIME_THRESH :
#          print "Firing screensaver!"
# uncomment for troubleshooting ^^^
# command to blank the screen
	   SCREENSAVER = "toshset -bl off"
# Set polling to a really quick interval when screen is blanked so it wakes quickly
           interval = .2
           os.system(SCREENSAVER)
           # Let this wait until the screensaver process finishes,
           # so we won't keep checking and fire up another copy.
       else:
           pass
#          print "Idle but only for", idletime, "secs"
# uncomment for troubleshooting ^^^
       continue

   # There's apparently no way to flush input without reading it:
   SCREENSAVER = "toshset -bl on > /dev/null"
# Switch back to longer polling interval when screen saver is off
   interval = 5
   os.system(SCREENSAVER)
#  print "There's something there in", len(inp), "devices"
# uncomment for troubleshooting ^^^
   last_event_time = time.time()
   for f in inp :
       os.read(f.fileno(), 4096)

I’d stick idlerunner.py in ‘/usr/local/source’ (along with toshset).  Make sure to set it executable.  You’ll want to add a file to your ‘/etc/local.d’ directory to start idlerunner in the background.

echo “/usr/local/idlerunner.py &” > /etc/local.d/idlerunner.start && chmod 755 /etc/local.d/idlerunner.start

Next, in your xorg.conf file, you’ll need to add some lines to your xorg.conf file.  These lines will prevent the odd behavior from the built in stuff from occurring.

In the Monitor section add: 

        Option          "DPMS"

In the ServerLayout section, add:

        Option          "BlankTime"     "0"
        Option          "StandbyTime"   "0"
        Option          "SuspendTime"   "0"
        Option          "OffTime"       "0"

This all turned out even better than I had hoped because it’s independent of X entirely and blanks the local consoles as well.  Props to Akkana for generously spending her time to help a complete stranger with a problem on a 15 year old computer.

I finally broke down and bought a Libretto 110CT.  This machine was pretty incredible for it’s day.  It’s a Pentium 233MHz with MMX and has 64mb of ram.  It had a 4.3gb hard drive in it.  That needed to go so I snagged another CF to IDE adapter off Amazon and put a 16gb Kingston CF card in it.

I didn’t bother trying to install Gentoo on the local machine.  That would be ridiculously slow and probably impossible because of the PCMCIA cdrom drivers.  I opted to use my much faster Celeron 466MHz.  I decided to dedicate that machine to building system disks for my 3 Librettos. I decided it would make life easier to grab a CF Adapter on a Bracket and stick that into the Celeron.

I’m glad I did this since this build-out required a LOT of experimentation.  I built up the system mostly as normal but the first deviation from the path was in the partitioning.  I made explicitly sure to make the first partition the /boot partition.  That had to stay under 1gb I believe but I kept it at 100mb since I figured that was all I needed.

Next, I used lilo.  In lilo, I did a couple of tricky things.  One of which was to use “linear” mode.  All these years I wondered what exactly that meant but now I know.  It’s a mode used for bioses that don’t support aalternate geometries such as LBA mode.  To be honest, I don’t think I really needed that setting on the Libretto 110ct but I’m positive that it’s necessary for a Libretto 50ct to boot a “disk” larger than a gig or so.  Also in lilo.conf, I specified some undocumented kernel features.  Let me print it here and then I’ll explain:

#lba32
# If lba32 do not work, use linear:
linear

# MBR to install LILO to:
boot = /dev/sda
install = /boot/boot-menu.b   # Note that for lilo-22.5.5 or later you
# do not need boot-{text,menu,bmp}.b in
# /boot, as they are linked into the lilo
# binary.

menu-scheme=Wb
prompt
# If you always want to see the prompt with a 15 second timeout:
timeout=150
delay = 50
# Normal VGA console
# vga = normal
# VESA console with size 800x480x24 (this warrants additional experimentation)
#vga = 0x808

image = /boot/bzImage-stable
root = /dev/sda5
label = Gentoo
append=”video=neofb:libretto”
image = /boot/bzImage
root = /dev/sda5
label = Test
append=”video=neofb:libretto”

So there it is, “video=neofb:libretto”.  That is one of the keys to making the framebuffer work on this system.  Someone already did the hard work for me of putting the necessary 110ct setting straight into the linux kernel for me.  I just wish they had documented it somewhere so I didn’t have to go digging through kernel code to find that.

Beyond lilo, the kernel config is also somewhat notable.  I’m running the 3.0.6-gentoo kernel on here which is the newest currently available.  My .config is definitely not optimized to the point it needs to be but it’s certainly a good starting point.  I would only suggest using it with the identical kernel version.  If not, I would only use it as a guide.  Mainly there is the Yenta PCMCIA, Neomagic Framebuffer, Generic PATA and some other tweaks.  Just read the config.

Next bit of secret sauce is in the xorg.conf.  That drove me (and some friends) completely nuts.  Partially because I tried to get too clever and compile dwm without xinerama.  That used to work, now it doesn’t.  Here is the xorg.conf I’m using:

Section “ServerLayout”
Identifier     “X.org Configured”
Screen      0  “Screen0” 0 0
InputDevice    “Mouse0” “CorePointer”
InputDevice    “Keyboard0” “CoreKeyboard”
EndSection

Section “Files”
ModulePath   “/usr/lib/xorg/modules”
FontPath     “/usr/share/fonts/misc/”
FontPath     “/usr/share/fonts/TTF/”
FontPath     “/usr/share/fonts/OTF/”
FontPath     “/usr/share/fonts/Type1/”
FontPath     “/usr/share/fonts/100dpi/”
FontPath     “/usr/share/fonts/75dpi/”
EndSection

Section “Module”
Load  “extmod”
Load  “dbe”
EndSection

Section “InputDevice”
Identifier  “Keyboard0”
Driver      “kbd”
EndSection

Section “InputDevice”
Identifier  “Mouse0”
Driver      “mouse”
Option        “Protocol” “auto”
Option        “Device” “/dev/input/mice”
Option        “ZAxisMapping” “4 5 6 7”
EndSection

Section “Monitor”
Identifier   “Monitor0”
VendorName   “Monitor Vendor”
ModelName    “Monitor Model”
HorizSync    31.5-48.5
VertRefresh  56-72
#    ModeLine     “800×480” 40 800 864 928 1088 480 481 484 509 -hsync -vsync
#       ModeLine     “800×480” 31.5 800 860 940 1000 480 508 511 525 -hsync -vsync
#    ModeLine     “800×480” 36.769 800 848 896 1120 480 508 511 525
#    HorizSync    25-75
#    VertRefresh    50-75
DisplaySize 160 100
EndSection

Section “Device”
### Available Driver options are:-
### Values: <i>: integer, <f>: float, <bool>: “True”/”False”,
### <string>: “String”, <freq>: “<f> Hz/kHz/MHz”,
### <percent>: “<f>%”
### [arg]: arg optional
Option      “ShadowFB”    “off”           # [<bool>]
Option      “PCIBurst”    “off”
#Option     “Rotate”                 # <str>
#Option     “fbdev”                  # <str>
#Option     “debug”                  # [<bool>]
Identifier  “Card0”
Driver        “neomagic”
Option “DisplayHeight480”
#    Driver      “vesa”
BusID       “PCI:0:4:0”
Option “override_validate_mode”
Option “XaaNoScanLineImageWriteRect”
Option “XaaNoScanLineCPUToScreenColorExpandFill”
EndSection

Section “Screen”
Identifier “Screen0”
Device     “Card0”
Monitor    “Monitor0”
DefaultDepth 16
SubSection “Display”
Depth     16
Modes “800×480”
EndSubSection
SubSection “Display”
Viewport   0 0
Depth     24
EndSubSection
EndSection

Fair warning, I’m not sure if this is totally optimal but it seems to do the trick for me.  Here is the make.conf I’m using now which also may not be optimal:

# Please consult /usr/share/portage/config/make.conf.example for a more
# detailed example.
CFLAGS=”-O2 -march=i486 -pipe”
CXXFLAGS=”${CFLAGS}”
# WARNING: Changing your CHOST is not something that should be done lightly.
# Please consult http://www.gentoo.org/doc/en/change-chost.xml before changing.
CHOST=”i486-pc-linux-gnu”

USE=”X mmx png python fbcon jpeg tiff xorg dri -minimal udev hal -evdev -alsa -pppd
-introspection -cairo ssl gtk ncurses -ipv6 -kde -gnome xinerama -test -savedconfig
-selinux -doc -static-libs crypt -pm-utils”
VIDEO_CARDS=”neomagic fbdev vesa”

At this point, I see no reason to leave the fbdev and vesa in the video cards section.  Some of the other flags are a bit random as well but at the moment, they are getting the job done.  Here is my current world file (for the curious):

app-admin/eselect
app-admin/syslog-ng
app-editors/vim
dev-lang/perl
dev-libs/glib
dev-vcs/subversion
net-analyzer/dsniff
net-analyzer/netcat
net-analyzer/nmap
net-analyzer/tcpdump
net-analyzer/traceroute
net-irc/ircii
net-irc/irssi
net-misc/dhcpcd
net-misc/ntp
net-misc/socat
net-wireless/wireless-tools
net-wireless/wpa_supplicant
sys-apps/pciutils
sys-apps/pcmciautils
sys-boot/grub
sys-boot/lilo
sys-devel/distcc
sys-devel/libperl
sys-kernel/gentoo-sources
sys-power/acpi
sys-process/vixie-cron
www-client/dillo
www-client/links
www-client/lynx
x11-base/xorg-server
x11-base/xorg-x11
x11-misc/dmenu
x11-terms/eterm
x11-terms/rxvt
x11-terms/st
x11-terms/xterm
x11-wm/dwm
x11-wm/fluxbox
x11-wm/twm

Some of the tools are for experimentation, others are requirements.  Another notable thing is my default runlevels:

lrwxrwxrwx 1 root root   18 Jan 15  1990 dhcpcd -> /etc/init.d/dhcpcd
lrwxrwxrwx 1 root root   15 Nov  6 14:39 gpm -> /etc/init.d/gpm
lrwxrwxrwx 1 root root   17 Oct  8 08:50 local -> /etc/init.d/local
lrwxrwxrwx 1 root root   16 Nov 13 12:37 ntpd -> /etc/init.d/ntpd
lrwxrwxrwx 1 root root   21 Oct  8 17:11 syslog-ng -> /etc/init.d/syslog-ng
lrwxrwxrwx 1 root root   22 Oct  8 17:11 vixie-cron -> /etc/init.d/vixie-cron
lrwxrwxrwx 1 root root   26 Nov  6 14:21 wpa_supplicant -> /etc/init.d/wpa_supplicant

Notice ntpd, dhcpcd and wpa_supplicant.  I’m using wpa_supplicant to do all wifi configuration.  It seems to work very slick and for any type of network I want now that I figured it out.  Here is a sanitized version of what I put in the /etc/wpa_supplicant/wpa_supplicant.conf file:

#WPA1/2 with passphrase
network={
ssid=”anotherlinksys”
psk=”password”
}

#WPA1/2 with passphrase
network={
ssid=”myrouter”
psk=”password”
}
#WEP with passphrase
network={
ssid=”TheAirlock”
key_mgmt=NONE
wep_key0=”the airlock rules!”
wep_tx_keyidx=0
}
#WEP hex key
network={
ssid=”linksys”
key_mgmt=NONE
wep_key0=0123456789
wep_tx_keyidx=0
}

You can have as many networks as you want in there and it seems to automatically jump to the best one.  Now, I wouldn’t actually need the wireless-tools package at all except for what I’m doing next.  In order to put proper status in the bar on dwm, I did a little .xinitrc scripting:

#!/bin/sh

ntpdate pool.ntp.org &

while true
do
LOCALTIME=$(date +%A” “%D” “%I:%M%p)
RAM=$(free -m | awk ‘/cache:/ { print $4″M Free” }’)
BAT=”Bat. $(acpi -b | awk ‘{print $4 ” ” $5 }’ | tr -d ‘,’)”

xsetroot -name “$BAT | $LOCALTIME | $RAM”

sleep 15s

ROUTER=$(iwconfig wlan0 | awk ‘/ESSID:/ { print $4″ ” }’ | tr -d ‘ESSID:”‘)
SIGNAL=$(iwconfig | awk ‘/Quality=/ { print $2 }’ | tr -d “Quality=”)

xsetroot -name “Access point: $ROUTER | Strength: $SIGNAL”

sleep 10s
done &

#startfluxbox
dwm

This flashes between two status displays.  The first stays on the screen for 15 seconds.  It looks like this:

Bat. 100% | Thursday 11/17/11 12:56AM | 15M Free

The second stays up for 5 seconds and looks like:

Access Point: linksys | Strength: 29/70

None of it is rocket science but I was rather pleased with myself.  It also makes dwm WAY more friendly.  I’m convinced that dwm is the best window manager for the Libretto 110ct because it’s the lightest I know of and makes the absolute best use of the screen real estate.  I would urge you to give it a try.  If you don’t like it, fluxbox is another great choice.

All in all, I’m certain there is more experimentation to be made.  BTW, udev is required to recognize pcmcia cards so don’t get the stupid idea I had to pull it out.  Speaking of which, I’m using a D-Link DWL-G650 wifi card which is atheros 5k-based.  It seems pretty stable overall.  One thing that does not seem 100% is the power management.  I think it has led to a couple of lockups for me.  Mainly when plugging and removing AC power but certainly not always.

Bottom line…  How many other modern, fully patched and up-to-date operating systems do you think would run on an ancient laptop like this?  Not many.  Next task is to get X forwarding and distcc working.  Then I’ll be off to hack the gibson…

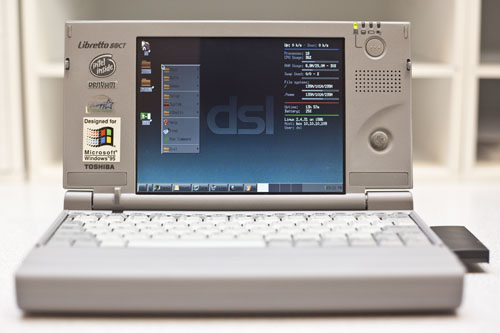
I’ve been trying to get some version of Linux on my Libretto 50CT for quite some time now.  One of my conditions for this is that I wanted it to run off of a compactflash card instead of the clunky old 800MB hard drive that originally came in the Libretto.  There is a problem with this though.  I’ve been running into a wall trying to use a 4GB CF card because of LBA mode or some other layer of translation.  For some reason, fdisk can’t come to grips with this.  Most reasonable Linux distributions need at least a gig of disk space but I searched out one that did not….  Damn Small Linux.

DSL only needs 200mb minimum which is perfect since I happen to have a 256mb CF card laying around.  I popped it into my Pentium 133 desktop system with a CF-IDE adapter.  I went into the BIOS to make sure to auto-detect the card in “NORMAL” mode instead of “LARGE” or “LBA” modes.  Then I used a Redhat Linux 5.0 disk I had laying around to fdisk the partition.  I created one big partition that took all of the space, made it bootable and saved/quit.

After that, I popped in the DSL 4.1.10 ISO-LINUX live CD.  It booted up into the gui and I ran:

sudo /usr/sbin/dsl-hdinstall

I made sure to run that from a black xterm so I could see the text.  At the end, when it said it wanted to reboot to finish the setup, I stopped the computer and popped the CF card into my Libretto and booted it up there.

It booted up just fine but when it got to X it was REALLY ugly and the mouse didn’t work.  I hit “ctrl-alt-del” to pop out of X.  At the prompt I ran:

xsetup.sh

I made the following choices:

  • Xvesa
  • no USB mouse
  • no mouse wheel
  • ps2 mouse
  • 2 buttons
  • 640×480 pixel
  • 16-bit color depth
  • no “choose own dpi”
  • us keyboard

After all that, I restarted X and it appeared picture perfect with a functioning mouse.

Next priority was network access so I popped in a Xircom card I’ve been toting around forever.

There is a nice control panel in DSL that allowed me to configure it pretty quickly.

Next was wireless access but the problem is that there is no support for WPA in the 2.4 kernel or in any 16-bit PCMCIA cards that will actually work in this laptop.  Luckily there were quite a few 16-bit PCMCIA wireless cards available.  I have a few but I happened to chose an Orinoco Gold Wireless PC Card since it’s a nice robust card and I have a couple laying around.

Being a security-minded individual, the best solution I can think of is implementing a wireless network with the following parameters:

  • a hidden essid
  • MAC filtering
  • WEP
  • 802.11B only
  • attached to my outside DMZ

Beyond that, I’m at a bit of a loss.  It’s still a WEP network afterall and there is only so much that can be done to secure it.  But alas, I snagged on of my extra WRT54G’s and configured it with those parameters in mind and everything is pretty much up and running flawlessly.  Time to rebuild another battery I guess 🙂

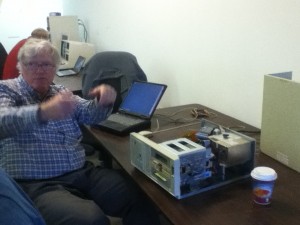
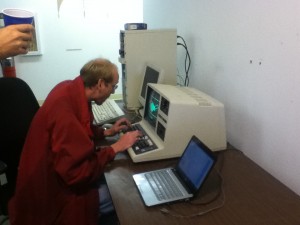
Someone on the DC206 mailing list posted about a Seattle Retro Computer Society Meeting which sounds cool on it’s own but what really caught my eye was that it was being hosted at Paul Allen’s new Living Computer Museum in Seattle.  This museum is not yet open to the public so I thought this would be an excellent opportunity to see the place and check out the retro computing meetup.  I showed up and the group was small (12-15 people) but very enthusiastic about what they were doing so that made it worth seeing.  It’s nice to know at least that I’m not the only one interested in old gear.

There was Frank who built a single board computer based on a 6800 in an old AT style chassis.  Very cool stuff.

Then there was someone who had a Tektronix computer that ran BASIC and was based on vector graphics.

Then Dave had an old TRS-80 but had a Catweasel card in his PC that allowed him to produce disks for that system (or nearly any other) from images stored on his system.  But I didn’t snag a picture of it.

Hanging out with and talking to all these guys was awesome but then the bonus came later when the museum guys Bill and Keith showed up and gave us a tour of the upstairs where they are working on the exhibits that will eventually make up the museum.

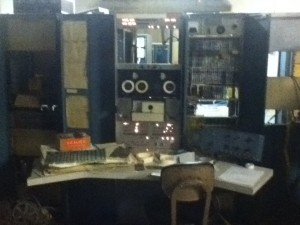
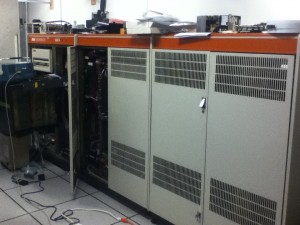
We made out way up the rickety elevator to the dimly lit 3rd floor and we suddenly transported to nerd-heaven.  First on the tour was a PDP-7 from 1967.  That is their oldest machine.

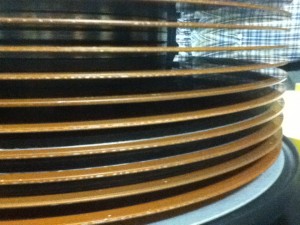
Next few stops we some other PDP’s that were all extremely cool too but the crashed 200mb hard drive really caught my eye.

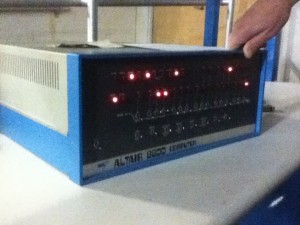
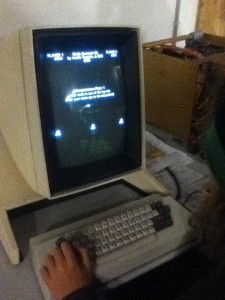
Then we moved on to see an Altair and a Xerox Alto which were both quite impressive.

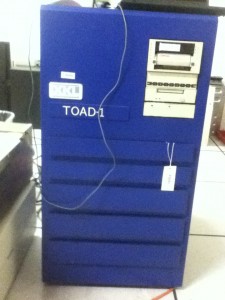
After those, there was an XKL Toad-1 hidden in the back road.  This system stands out in my memories because I actually went to XKL a couple of times when the Toad-1 was being built.  I picked up a bit of trivia today about it.  Toad apparently stands for “ten on a desk” which refers to the PDP-10 it was built to emulate but they didn’t quite get there with the large rack mount form factor.

In the same room as the Toad-1, there was also a couple of DEC System 20’s.  One of which they had interfaced with a modern NAS in order to preserve the life of the system’s hard disks.  Speaking of which, there were a few of those in there as well.

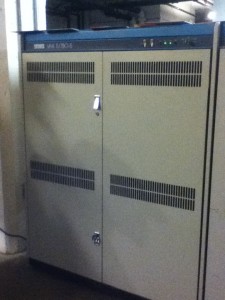
The tour ended with what probably was the newest system there which was a mid to late 80’s DEX VAX 780.  Still pretty old stuff but I would wager that there are a lot of VAX systems out there still in use today.

Can’t wait for the SRCS meeting next month.  Now I have a better idea of how it works and have some cool stuff I can bring to share and hopefully everyone will get a kick out of it.  If you want to see more even better pictures of the types of computers this museum has, check out this book Core Memory.


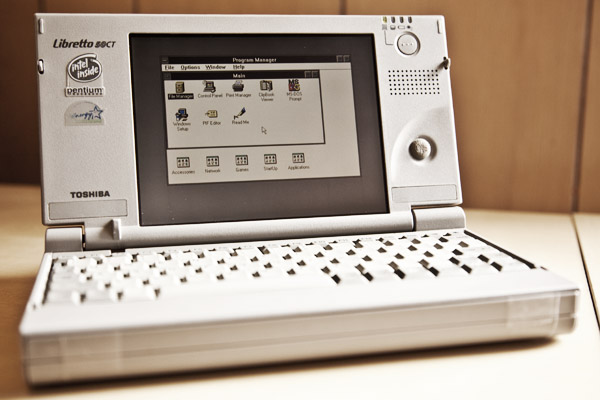
When the Libretto 50CT shipped brand new in 1997, it came preloaded with Windows 95.  Windows 95 is kinda of useless to me though since I’m mostly interested in running dos games.

That being said, I was digging through my old CDs and found a MSDN CD I picked up from somewhere years ago that had Windows 3.1 and Windows for Workgroups 3.11. There were about 20 languages on the disc but only 3.11 had an English version.

I pulled the flash card that I’m running the Libretto off of out and stuck in in another system so I could copy the entire 11MB directory off the CD onto the card.  It was about 560 files total.  If only modern graphical desktops were 11MB’s these days…

After I stuck the card back into the Libretto, I ran setup.exe and opted for the express installation.  From start to finish it was done installing in under 3 minutes I think.  After the install it wanted me to reboot so, for the full retro experience, I was happy to oblige. When the dos prompt came back up, I typed “win” and thought of Charlie Sheen for some reason.

The Windows For Workgroups splash screen came up and the full desktop was showing in under 15 seconds or so. WFW is blazing fast on this ancient hardware.

I poked around the settings a bit and remembered how both crude and elegant this piece software was in it’s day. All of the bundled applications run flawlessly of course. I wish I had some third party software to try out though. Perhaps I’ll dig a bit deeper in my box of goodies…

Seattle retro gaming scene

I recently found out that we are getting our very own Seattle Retro Gaming Expo in Seattle.  This is great news since the Portland one is alright but is kind of a long drive for my personal level of interest and commitment.  In the process of spreading the word about this new expo, I was made aware of many other pockets of retro nerd-dom around the city.

Of course there is the Pink Gorilla in two separate locations if you want to purchase home games but digging further into the scene, I now heard of several other actual arcades that I intend to check out at some point:

Shorty’s is a bar in Belltown that has about 16 pinball tables and 13 arcade games currently including pac-man, robotron, guitar hero and many more.

Full Tilt Ice Cream in White Centre or Columbia City apparently has some 80’s arcade games but they don’t specify which ones or how many on their site.

Red Star pizza in West Seattle looks darned tasty and apparently has few arcade games as well.

The Seattle Pinball Museum Project in the International District is good if you like, pinball.  Last I heard was that it was $5-7 for unlimited play.

There’s the NW Pinball and Gameroom show which is an event, not a place.  They have unlimited play with admission, tournaments, sales, and more(pinball as well as classic arcade).

For an extra drive, if you are in Tacoma there is the B & I which has a HUGE arcade with lots of retro games although it is not particularly well maintained.  It’s really huge though, I’m not kidding.  I haven’t counted the games there but I would estimate that they have at least 75 of them.  I rarely have seen a crowd there either.

Last but not least, in a category all it’s own, there is The Airlock in Kirkland where you can place battletech in full sized Tesla gaming pods for a rock bottom price.

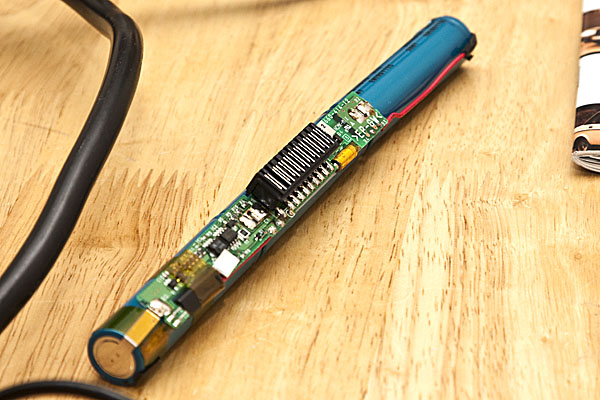
Since I bought my Librettos for $15-$20/ea, I didn’t want to spend $40 on a rebuilt battery so I decided to have my friend James help rebuild a couple of the packs I have.

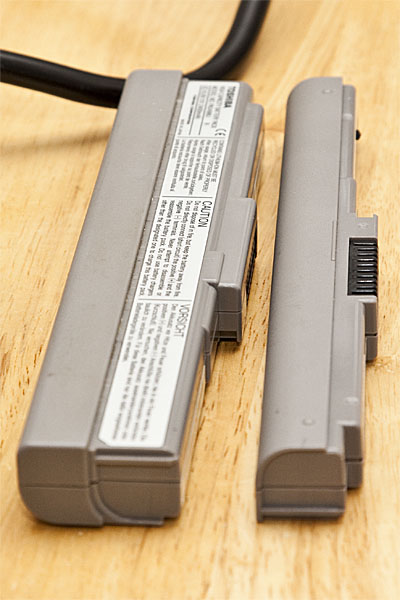
I have a 2 x 6-cell packs and 1 x 3-cell pack.  I purchased 9 “new” “Sony” 17670’s off of eBay.  I say new in quotes because they were not new when they arrived.  They obviously had been welded previously and someone ground the solder tabs off of them.  Also, we tested all 9 of the cells before we soldered up the pack.  Out of the 9, we found 3 of them at .66-1.30 volts.  When a Lithium Ion cell gets discharged to that point, you can kiss it goodbye.  It’s no longer viable because the chemistry changes and becomes less stable.  Another 3 were in the 2v ranges which may have been recoverable but probably not worth screwing with since it’s still outside of the specified operating range.  The final 3 were in the 3v range which was ok.  4.2v would be fully charged and none of them were anywhere near that.  Not that I’d expect them to be.

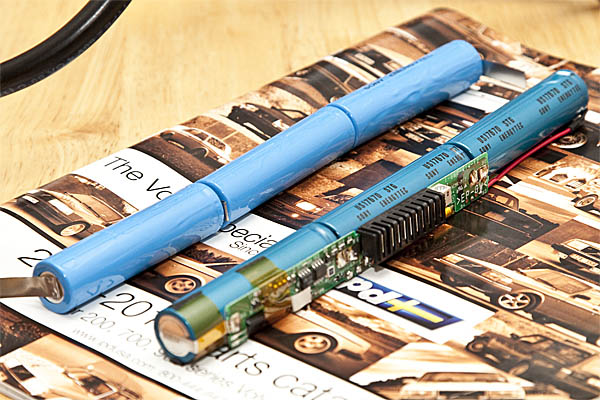
I say Sony in quotes because the batteries were counterfeit.  We could tell this because the physical structure of the cells are all slightly different and mismatched.  The blue jackets are printed at a very low quality level and are wrinkled in places where they’ve been improperly shrunk.

Counterfeit batteries are a HUGE problem on eBay.  I firmly believe that probably over 85% of the Lithium Ion batteries on eBay are counterfeit or of inferior/dangerous quality.  Most of them are extremely overrated as well.  For instance, a 18650 cell simply cannot hold 4000MaH.  It’s not physically possible for on of these cells output that much energy without draining it to an unusable state.

Whatever the case, our theory is that we are sending out batteries over to China to be recycled and they are disassembling the battery packs and reshrinkwrapping them and then selling them back to us on eBay.  Not sure if that’s the case with all of it but I’m sure that some of that is happening.

In the picture above, you can see very clearly the example of the wrinkled jackets.  Also, notice the real Sony cells on the right have different/darker colored jackets.

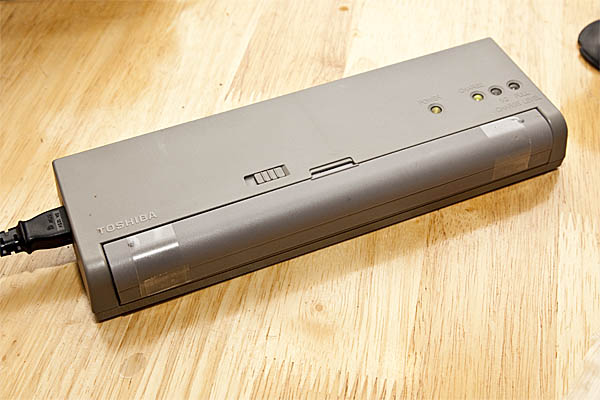
We finished the 3-cell battery up anyways with the 3 half-decent cells we picked from the batch.  I tossed it in my fancy outboard charger that came with one of the laptops and so far so good.  No heat and no smoke.  Time will tell if the rebuild was even worth the trouble.

Powered by WordPress. Theme: Motion by 85ideas.