I’ve been spending a lot of my free time lately helping the guys over at The Airlock bring some of their newly acquired arcade games back up to good working order. The majority of the time, monitors are the problem area with these games.
One of the latest ones I fixed was Donkey Kong. It’s an original dedicated Nintendo cabinet from the early 80’s. One of the better looking design schemes out there. In the cabinet is the original Sanyo EZ 20 monitor mounted up on it’s side which is important to note for later…
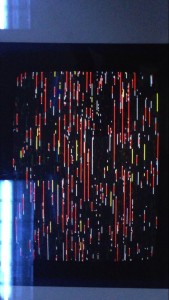
This monitor had a weird problem. It lost all ability to hold the picture horizontally which appeared as vertical static since the monitor is mounted sideways. The weird thing though was that when you first turned it on, it was fine but then if you rebooted it, this condition existed. Sometimes it went into this condition after many hours of play though as well.p
With monitors, my usual starting point is caps. The electrolytic capacitors in this monitor appeared to be 30+ year old originals. CRT monitors are notoriously hard on caps. These games were only designed to last 2-3 years at the most since in the golden era of arcade, it was unfathomable that anyone would care about a game past that point.
Back to Donkey Kong though. Of course I started with the caps. I figured I had fixed it when I fired it back up to a perfectly clear picture. I turned it off to finish reassembling the monitor and when we turned it on to retest, we found our familiar squiggles.
Kelly, one of the guys at The Airlock, thought this may be a logic board problem in the video circuitry since it was a problem we were unfamiliar with in our experience of fixing monitors. After 20 feet of solder later and many questionable joints fixed on the logic board the problem still remained however.
Enter the freeze spray
Since the problem appeared only after the game warmed up, I figured that we may have a chance to pinpoint the faulty component with the old freeze trick. I grabbed a can of r134a that is on hand there and the little red straw and started blasting while someone watched the screen for me. It didn’t take long since the screen went back to a perfect picture practically on my first spray.
I power cycled the system and luckily the problem immediately reoccurred. We repeated this process, each time being more precise with the can of spray until we finally pinpointed the problem component, a 1/4w 1k resistor. Swapping that out fixed the problem and it’s been rock-solid ever since.
It was interesting to me that a resistor became heat sensitive. I was originally expecting it to be a solder joint, a cap(but they were all replaced) or a heat-sensitive IC perhaps.
If you like the content on this site, please support it by using this link to order from Amazon. You know you were going to go there and buy stuff anyhow so why not help me pay the hosting bill.


